How to sew a Christmas Present Quilting Block – Wall hanging and cushion cover sewing tutorial
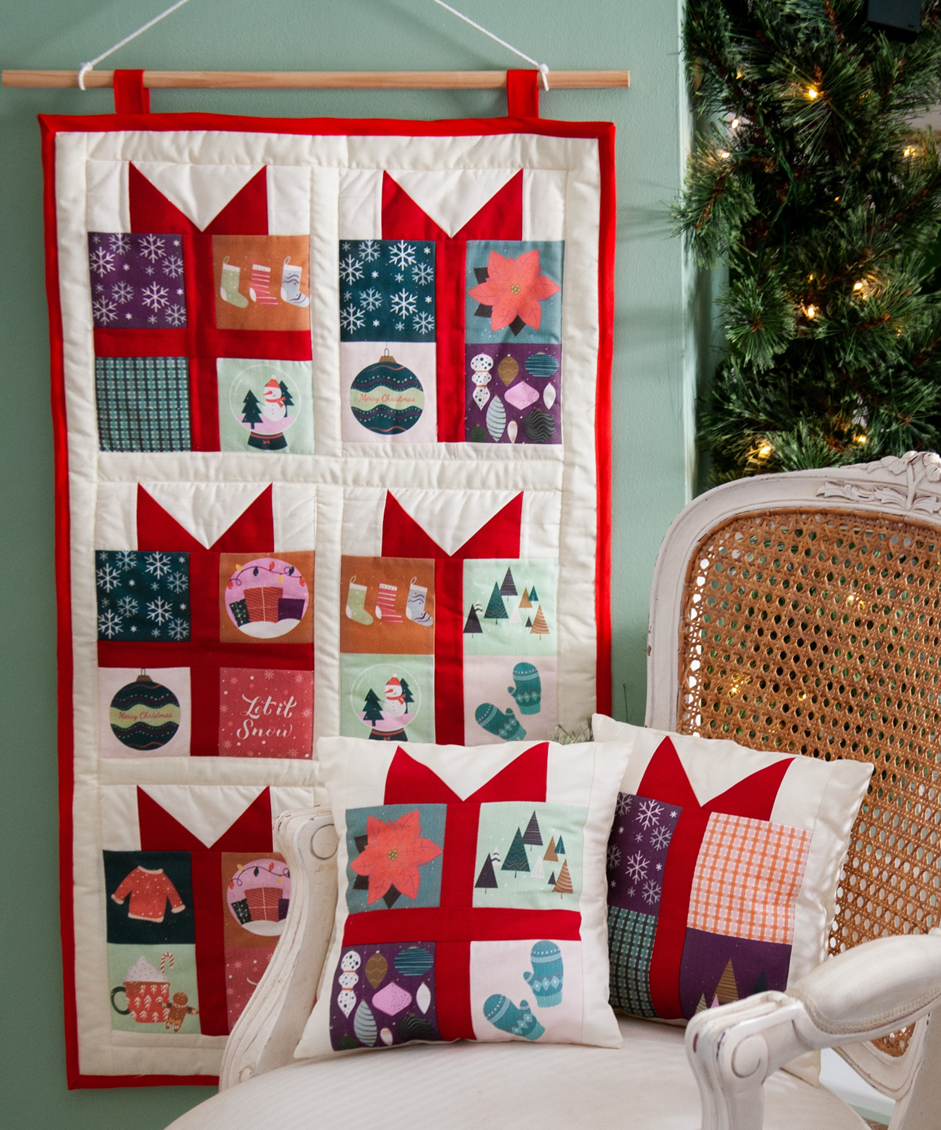
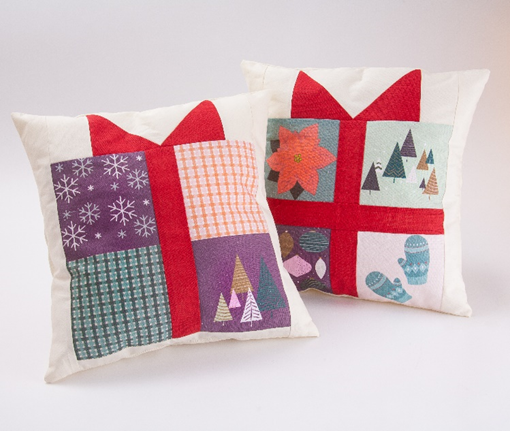
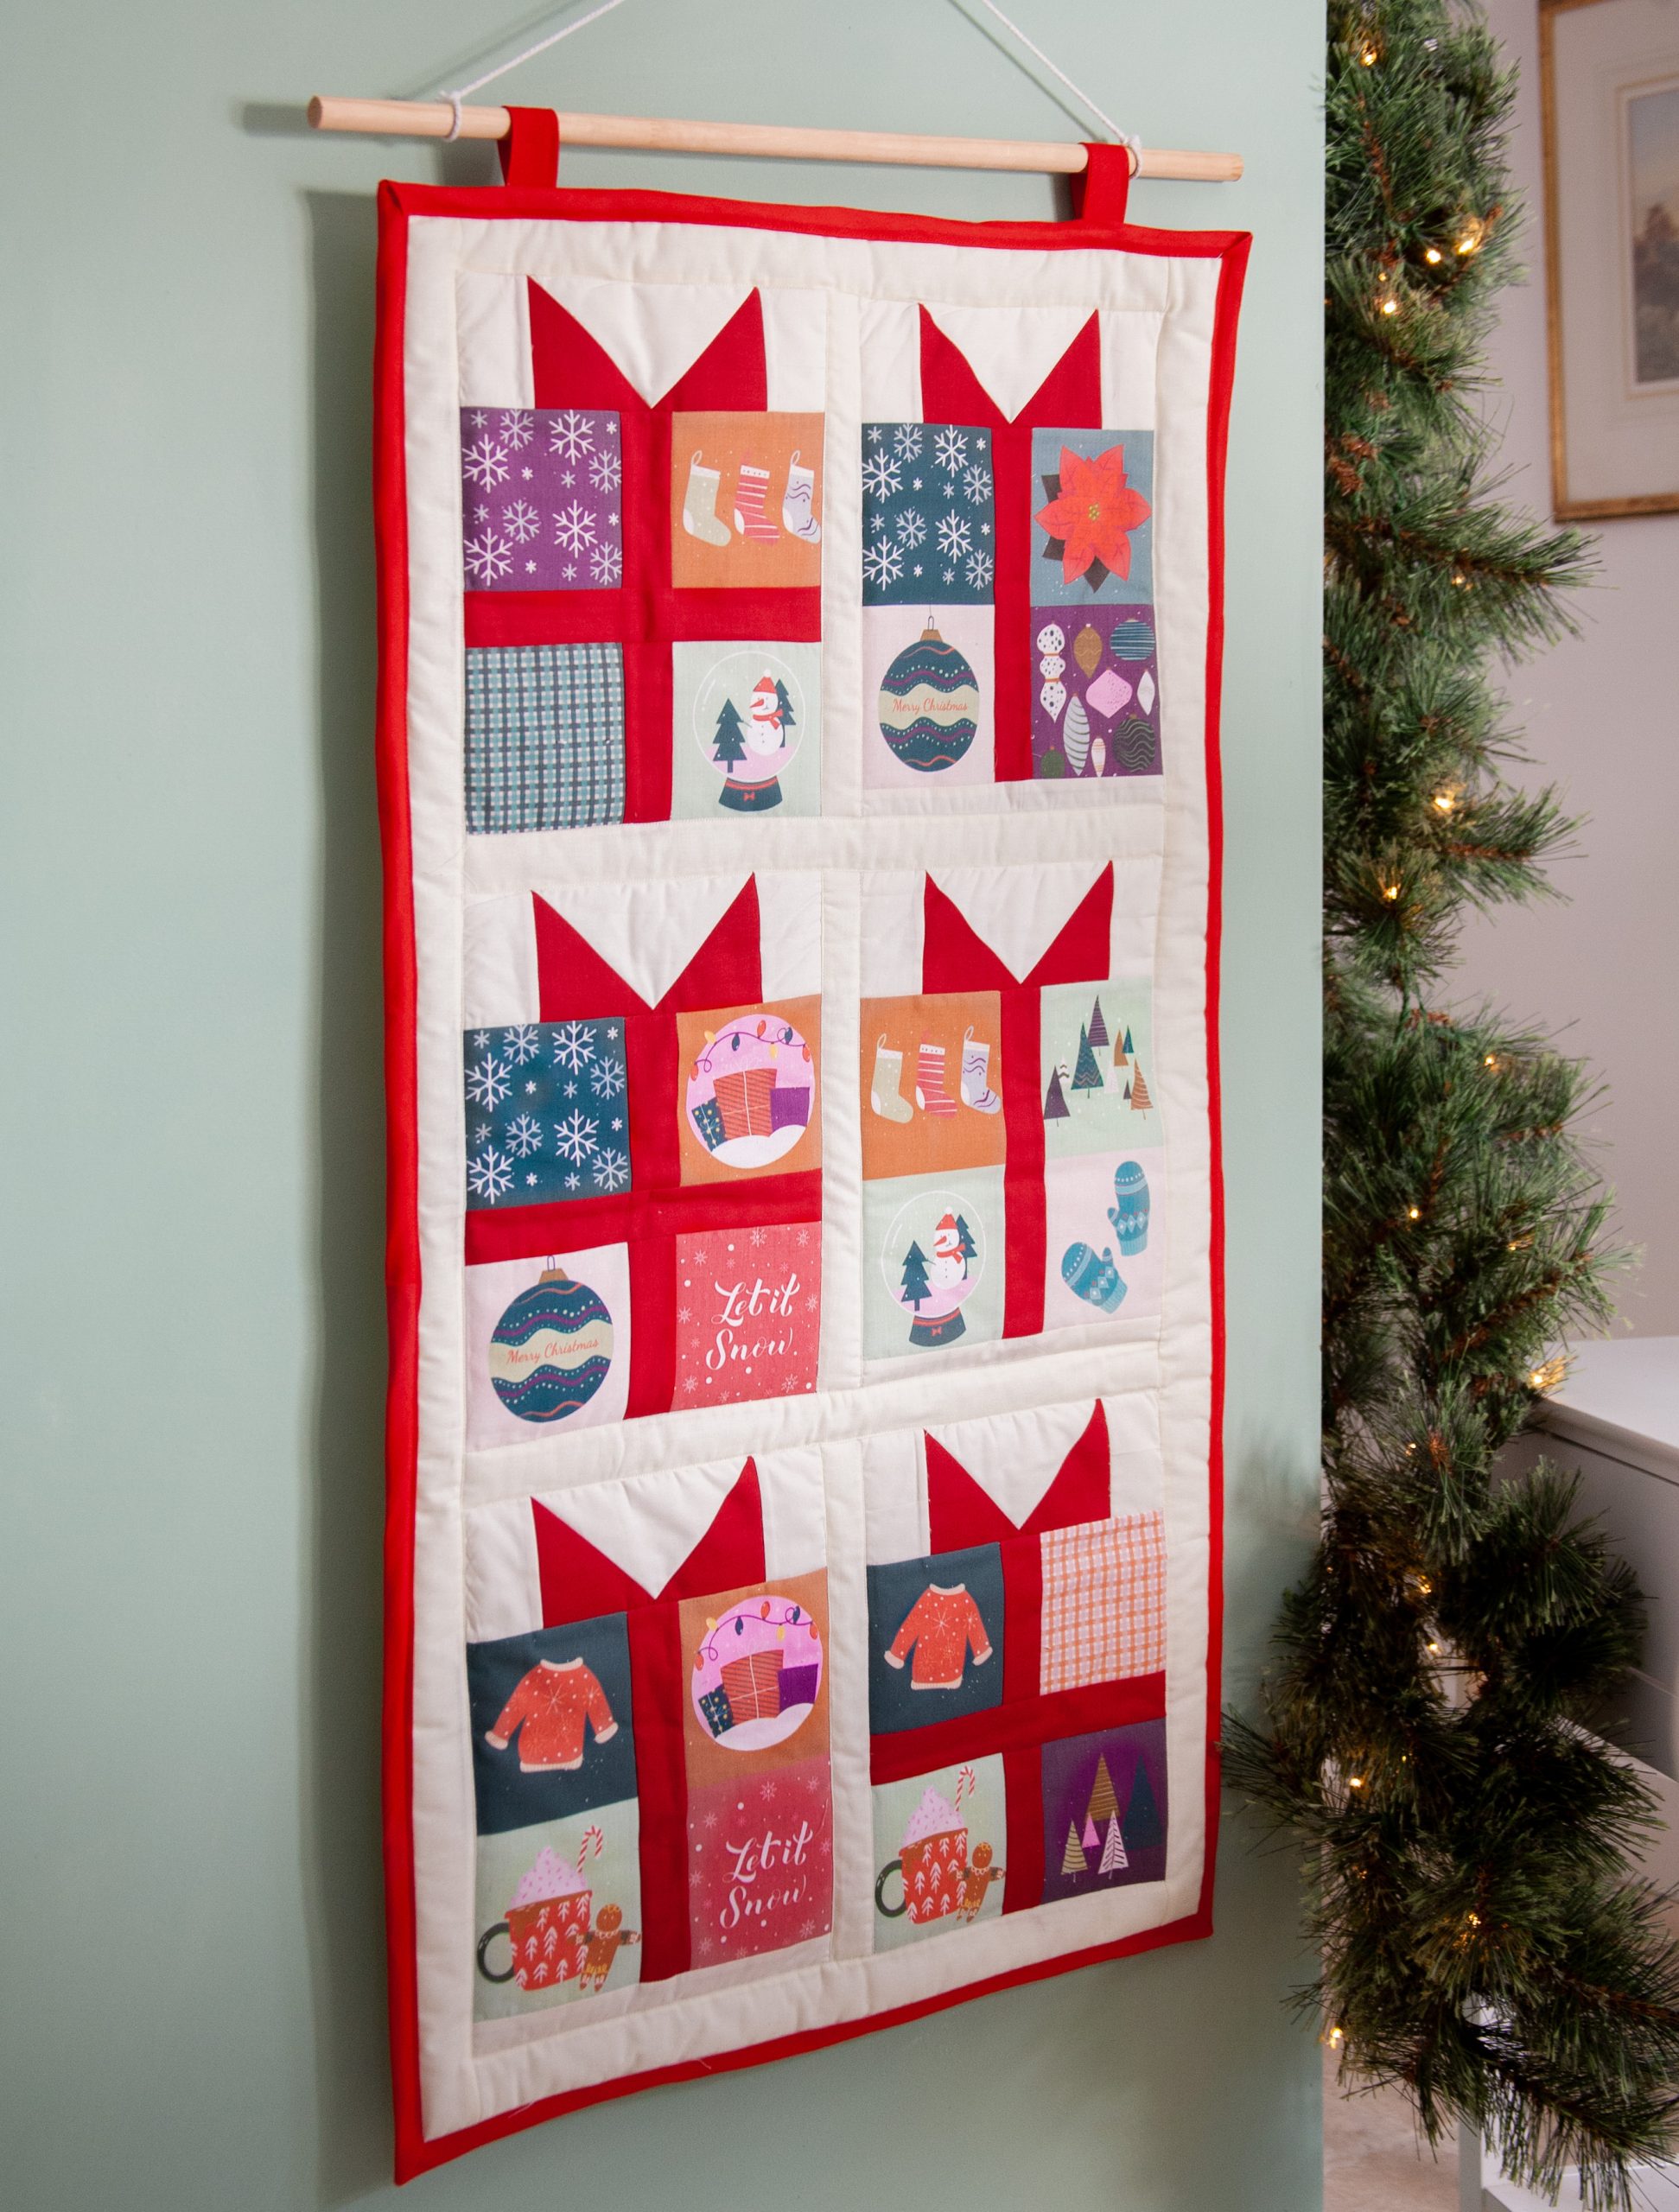
Decorate your home this Christmas with this festive wall hanging and cushions set. They are both made using half of the Christmas Squares panel with a plain cream and plain red cotton. This tutorial uses the Christmas present quilting block to make a wall hanging and 2 small cushions, but this same technique can be applied to make quilts, table runners, place mats and so much more!
What you’ll need to make both projects:
Christmas squares panel
112cm x 35cm Cream fabric
112xm x 17cm Red fabric
60cm x 110cm Backing fabric
60cm x 110cm wadding
300cm of 2.5cm wide single fold Bias binding
56cm hanging rod
28cm cord to hang
Two 26cm cushion pads (if you can’t find any the exact size you could make them from two squares of 27cm fabric stuffed with toy filler)
Finished size of wall hanging: 52cm x 93cm
Finished size of cushions: 26cm x 26cm
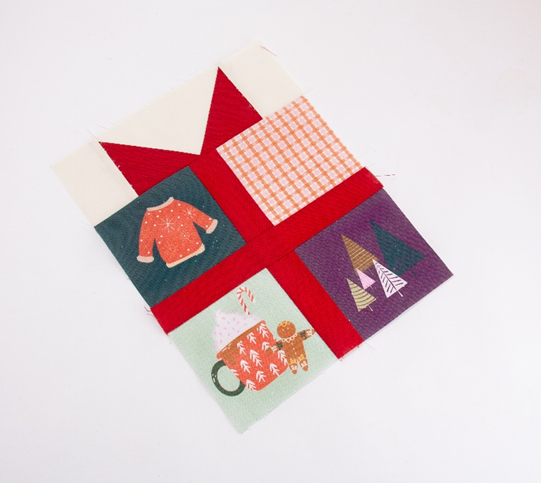
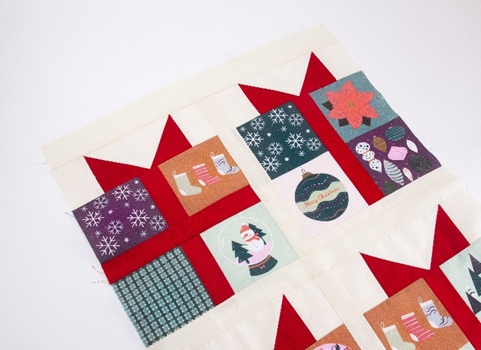
Sewing the present block
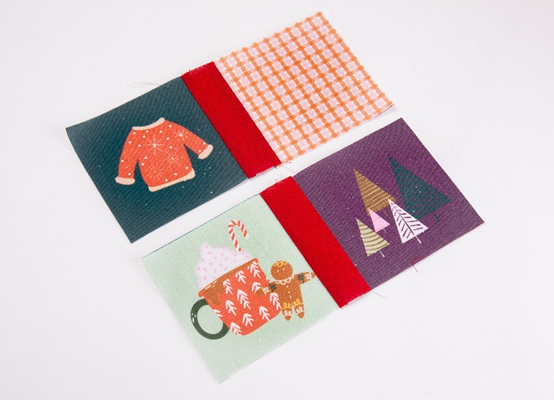
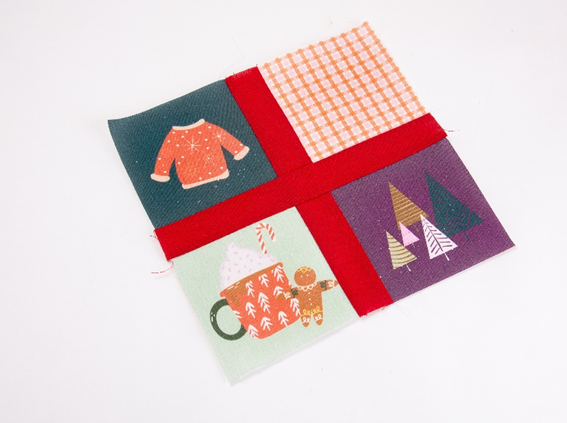
- Cut 4 squares from the panel. Cut two strips of red fabric the width of the square x 4cm.
- Sew a 10cm strip of red fabric right side together to the right-hand side of the first square.
3. Open out and press, then sew the second square right side together to the other side of the strip. Open and press.
4. Repeat with the other two squares.
5. Sew a strip of red fabric measuring 10cm right sides together to the top of the bottom two squares strip.
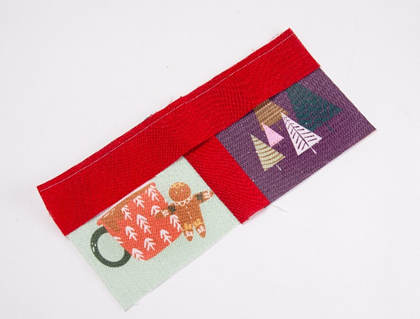
6. Open and press. Sew the top squares strip right sides together to the opposite side of the red strip.
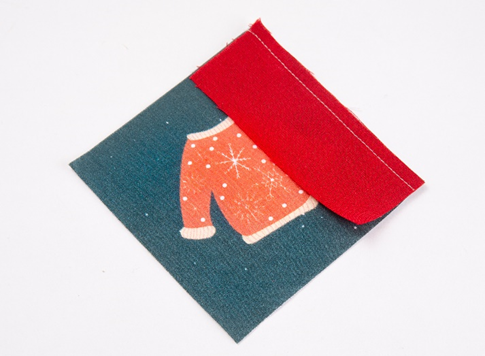
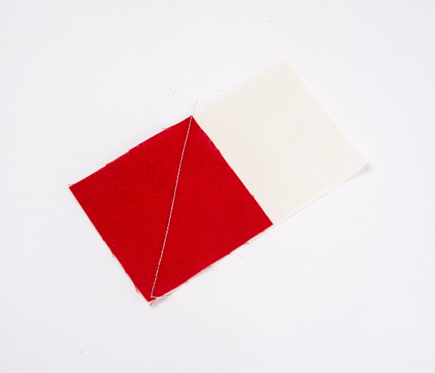
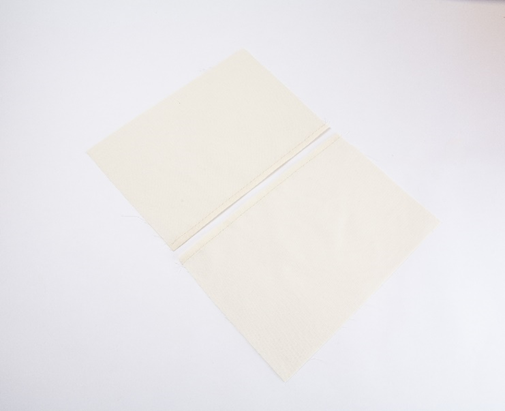
7. Cut a strip of cream fabric measuring 14cm x 8cm and two red squares measuring 8cm. Draw a diagonal line through the red squares and place over the left side of the cream strip with the diagonal line going from the bottom left of the square. Sew along the drawn line.
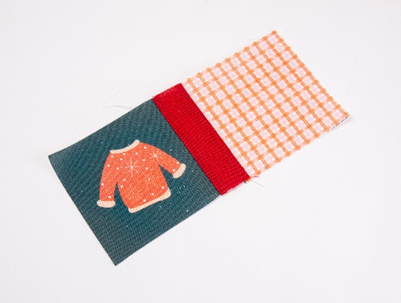
8. Fold the red square over and press. Place the second red square over the right side of the cream strip, overlapping the first square slightly at the top. Sew in place.
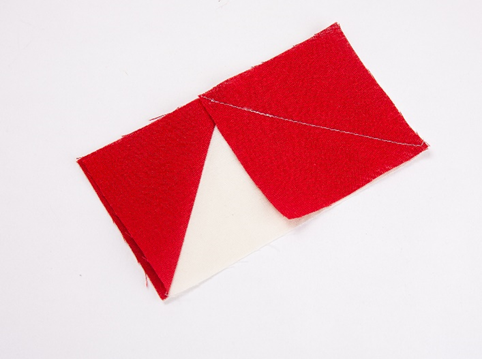
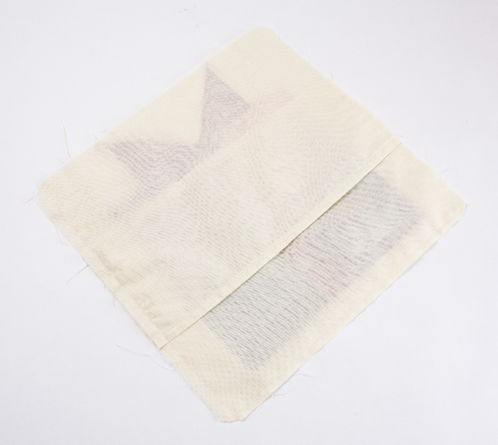
9. Fold the second square back and press. Trim the back of the triangles to the seam.
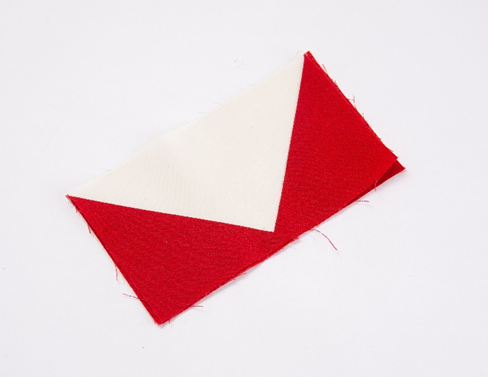
10. Cut 2 strips of cream fabric measuring 5cm x 8cm. Sew to either side of the bow.

11. Sew the bow strip right side together to the top of the squares. Trim back any excess fabric.
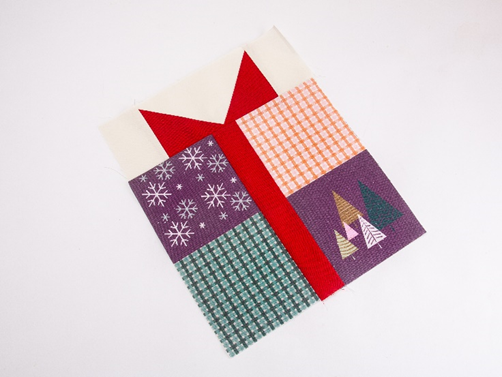
The second type of present block only has one strip of red fabric down the centre. To do this, repeat the same steps as the first but rather than cutting 4 squares, cut 2 vertical rows of 2 squares.
Cut a strip of red fabric measuring 10cm and sew the square rows to either side.
Repeat the same steps as before to make the bow.
Sewing 2 matching cushion covers
- Create 2 present blocks from the steps previous.
2. Cut 4 strips of cream fabric measuring 28cm x 5cm. Sew to either side of the present blocks.
3. For the back of the cushions, cut 4 pieces of fabric measuring 28cm x 21. Cm Hem the top edge of two pieces and the bottom edge of the other.
4. Lay the backing fabric over the right side of the Christmas present block overlapping the hemmed sides at the centre.
5. Sew around the entire edge of the cushion cover. Snip the corners, being careful not to cut through any stitches.
6. Turn the right side out and press. Repeat with the second cushion.
7. Insert the cushion pad to finish.
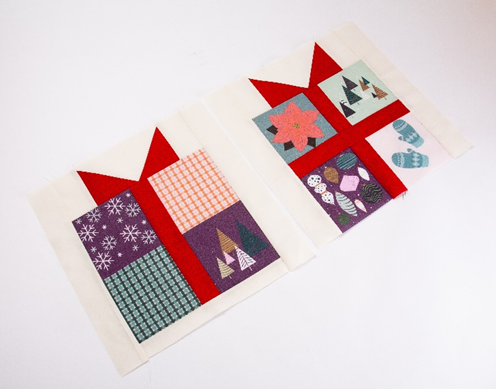
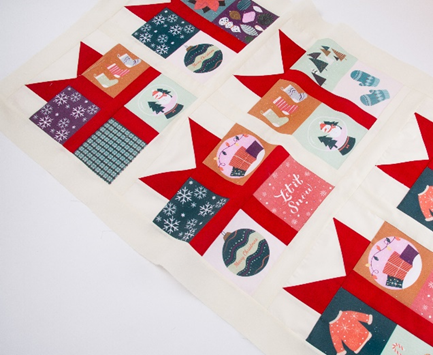
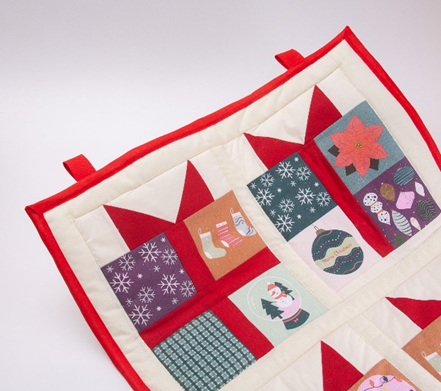
Sewing a Wall Hanging
- Create 6 Christmas present blocks.
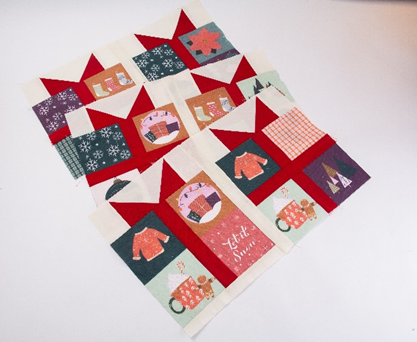
2. Cut 3 strips of cream fabric measuring 28cm x 5cm. Sew a strip of cream in between the blocks in pairs. Trim if necessary to the same length as the blocks.
3. Cut 2 strips of cream fabric measuring 45cm x 5cm. Sew the three present blocks together with a cream strip in between each row.
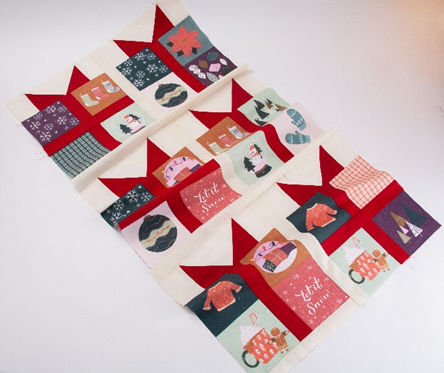
4. Cut 2 strips of fabric measuring 45cm x 5cm. Sew to the top and bottom of the wall hanging.
5. Cut 2 strips of cream fabric measuring 95cm x 5cm. Sew to either side of the wall hanging. Trim back if necessary.
6. Adhere the wall hanging to the wadding. Adhere the backing fabric to the back in the same way.
7. Quilt as you like, we’ve chosen to simple sew around each block, if you prefer you could echo quilt or cover the panel in diagonal lines (cross hatching).
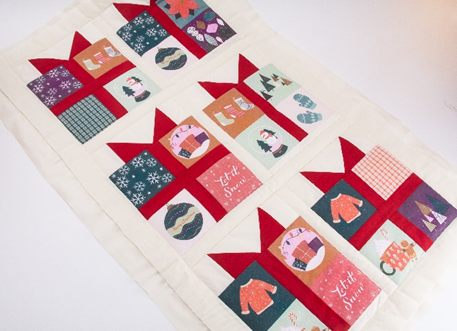
8. Trim the edges to the same size as the top and sew bias binding around the entire edge to finish. To sew the binding with a sewing machine, sew the binding right sides together to the back of the wall hanging first. Fold over to the front and sew in place, mitring the corners and overlapping the ends.

9. To create the hanging tabs, cut 2 strips of bias binding each measuring 40cm. Fold in half right sides together and top stitch along each side. Fold each in half, then fold the ends under. Sew just underneath the binding, 10cm from each top corner, with the raw edges of the tabs tucked inside so they aren’t seen.
10. Thread the hanging pole through the tabs and tie the cord to each end to hang.
Happy sewing! Debbie & Kym