How to sew a Handy Plastic Bag Dispenser – step by step tutorial
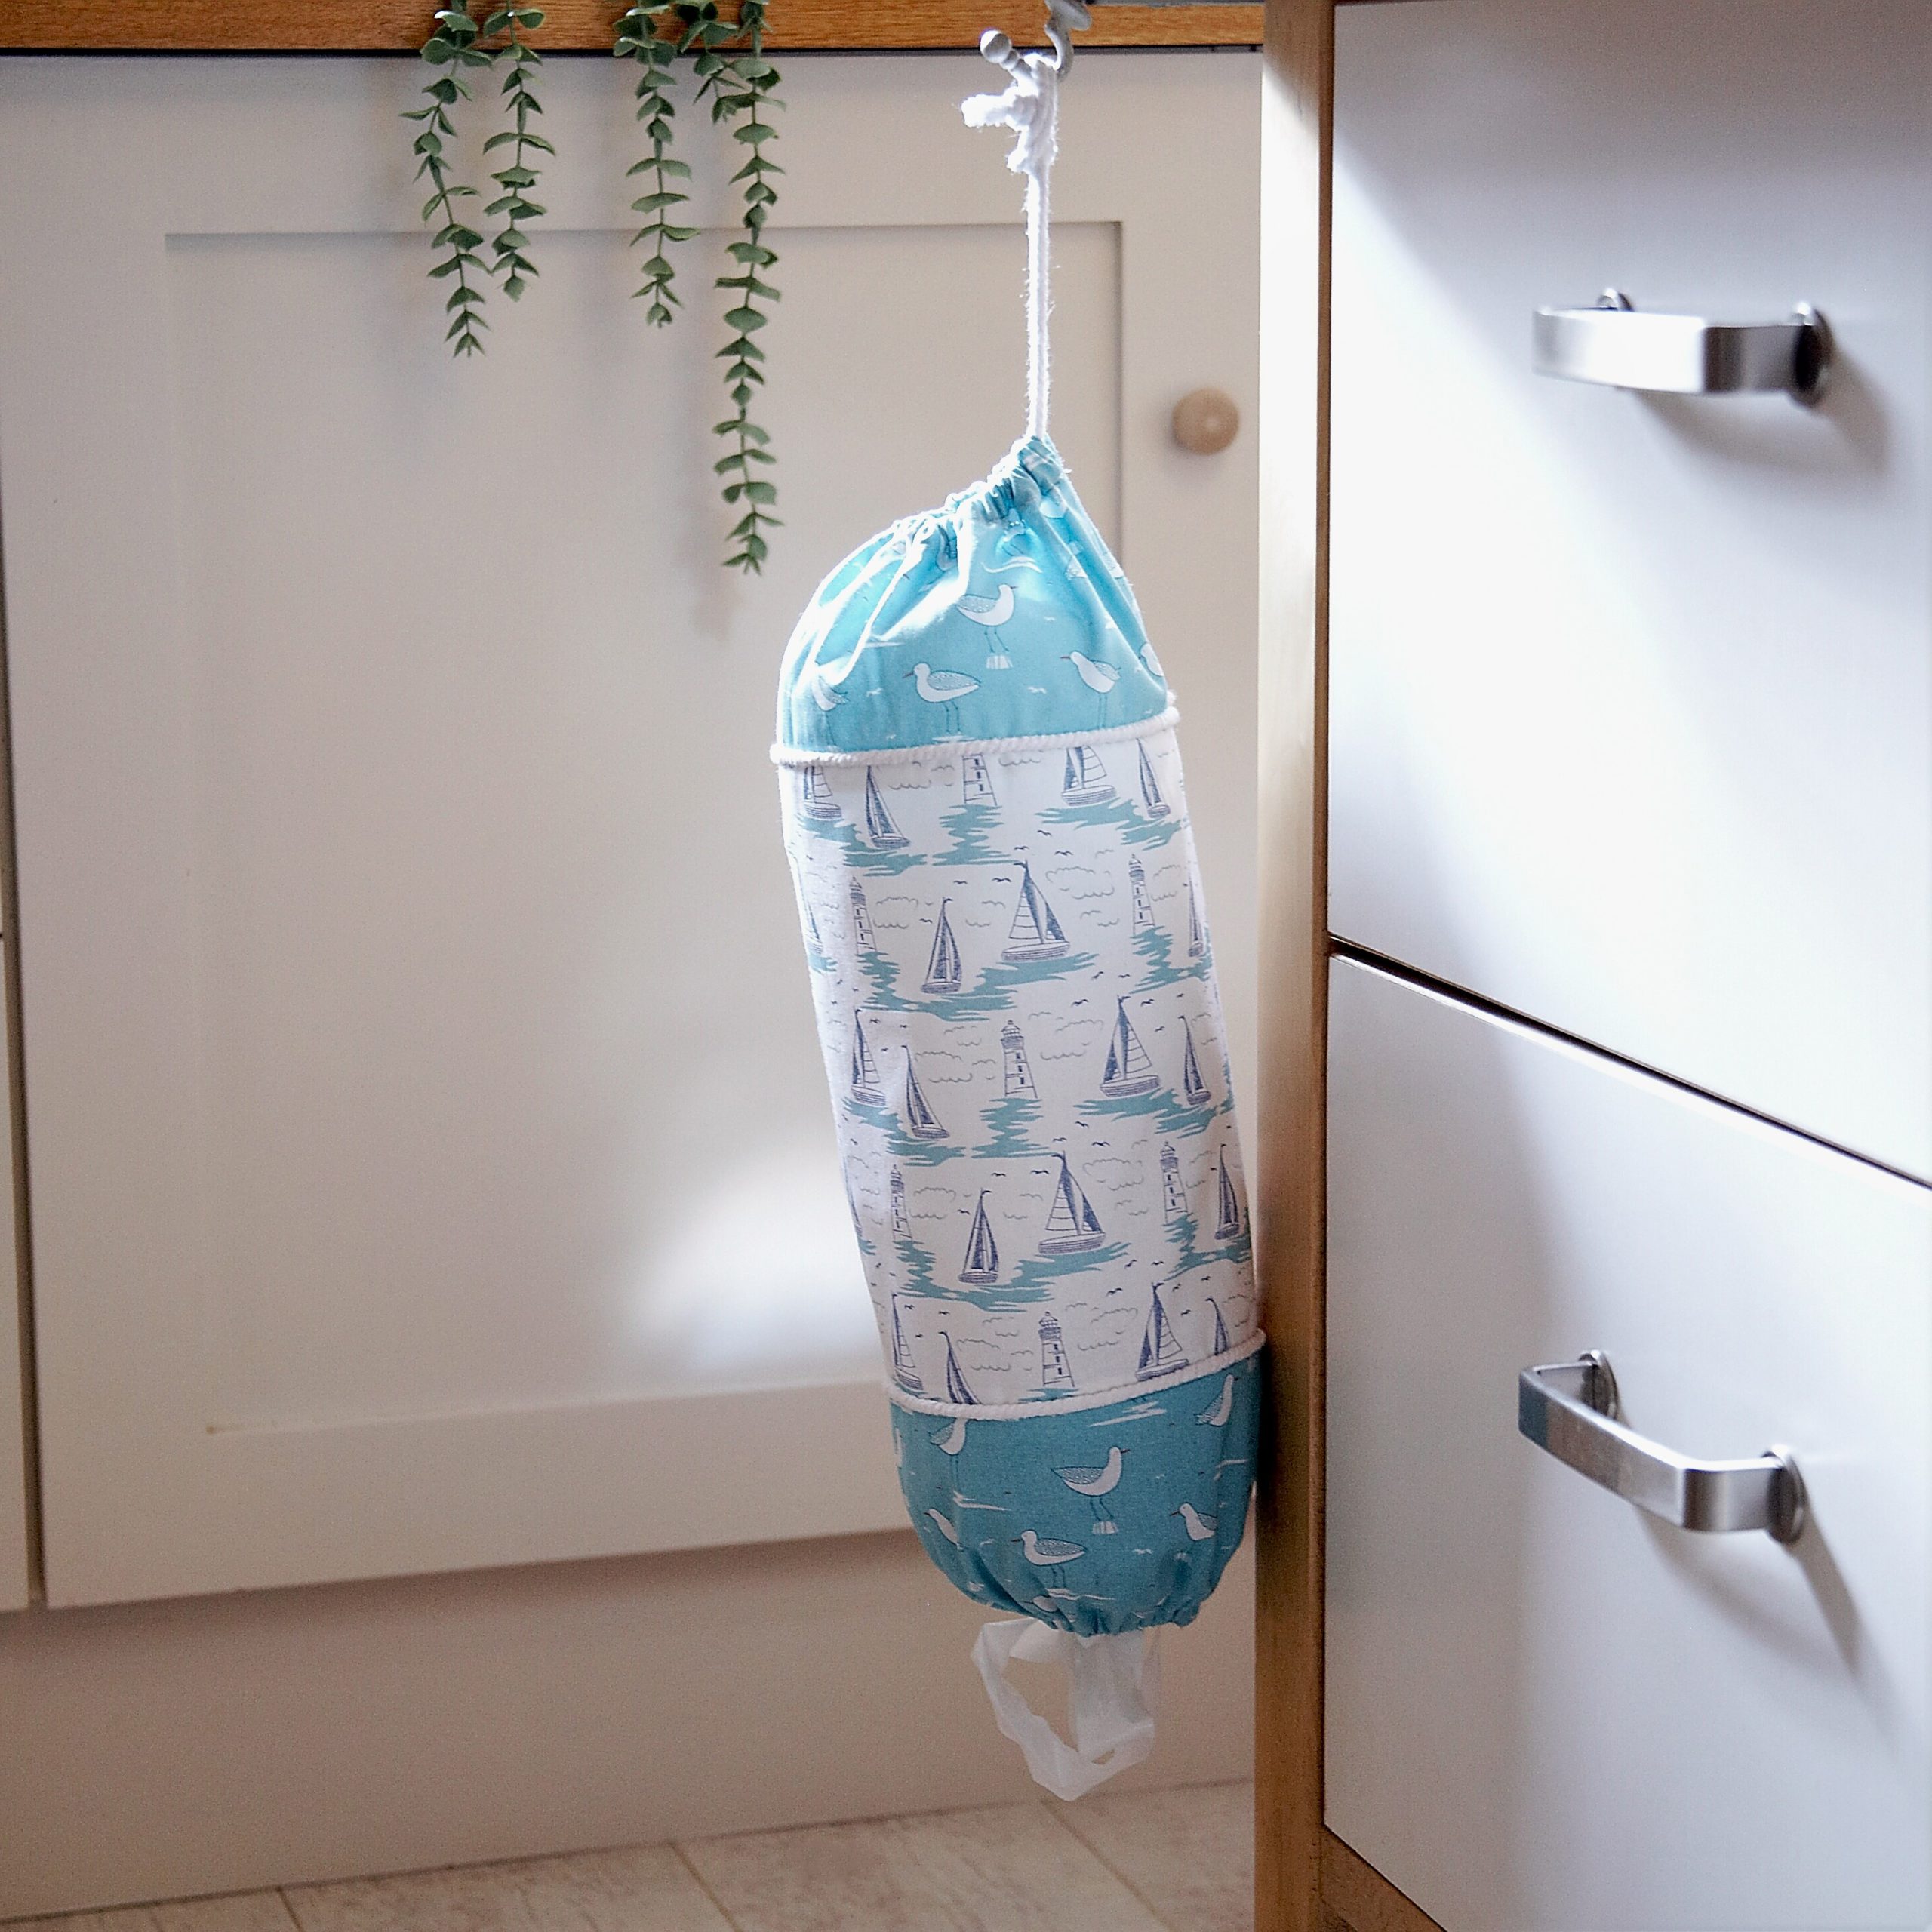
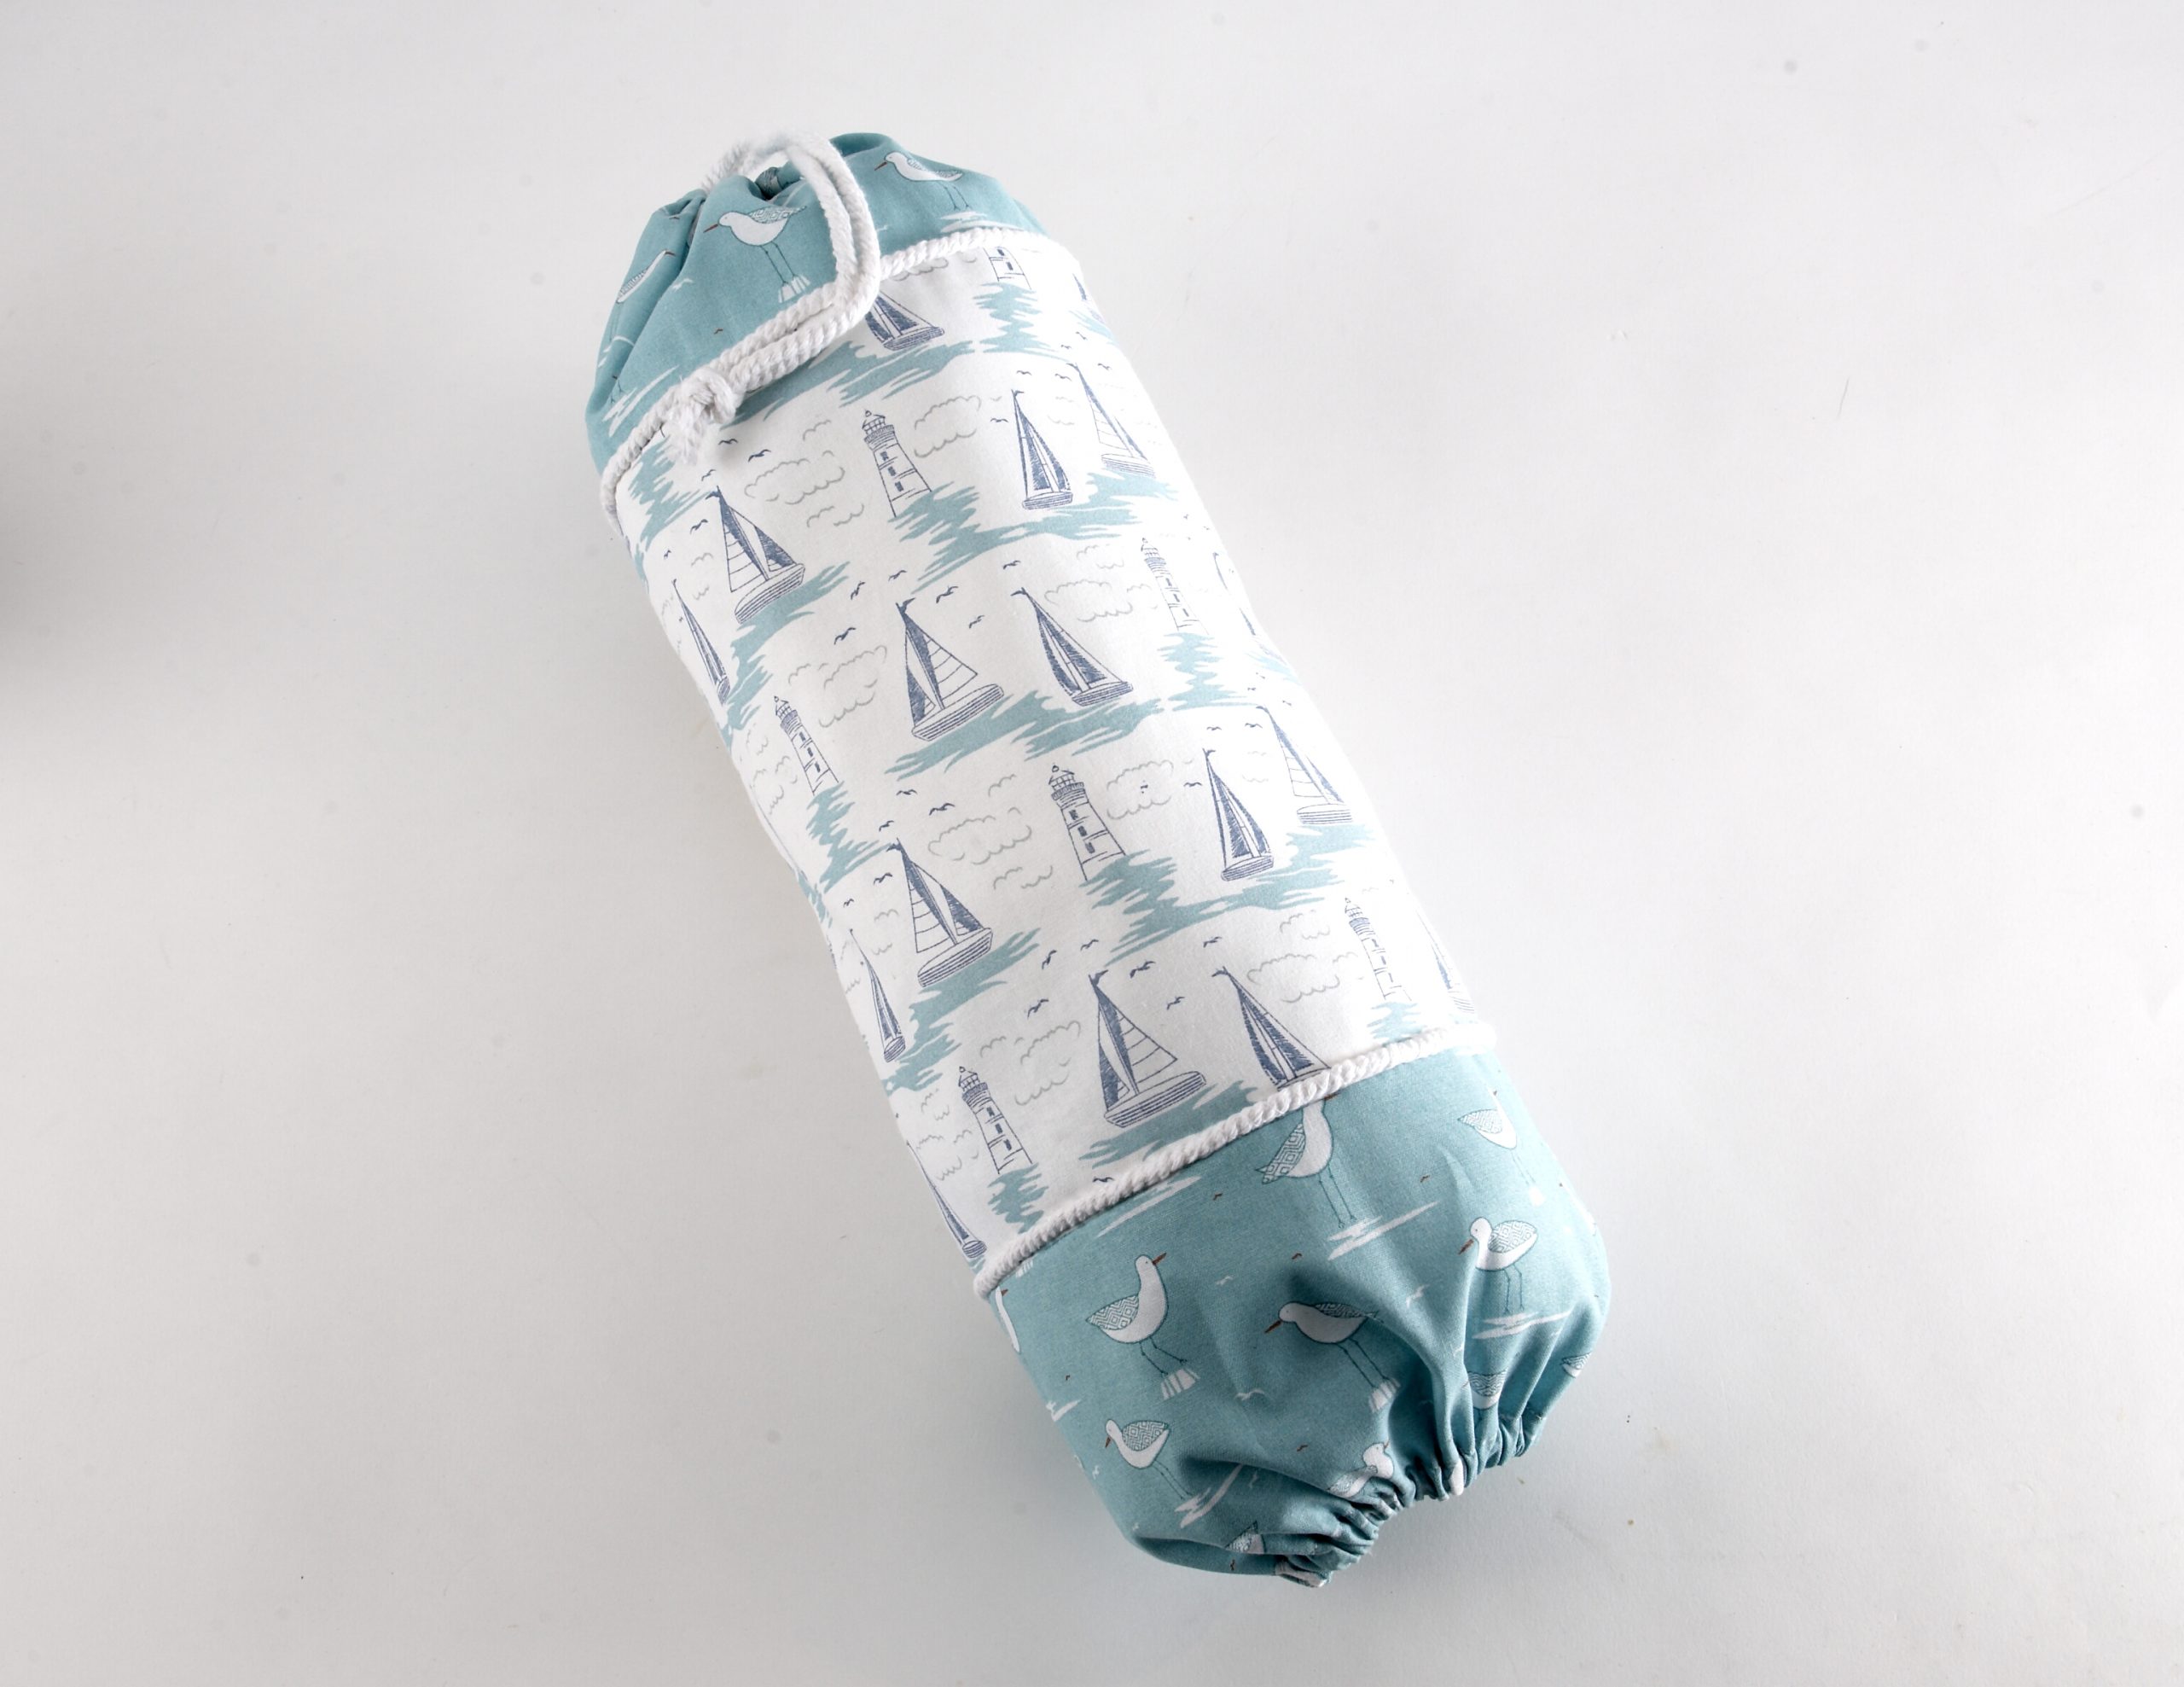
A bag dispenser is perfect for added space saving storage of your plastic carrier bags helping you organise your kitchen cupboards. This dispenser uses two different prints and rope trim.
What you’ll need:
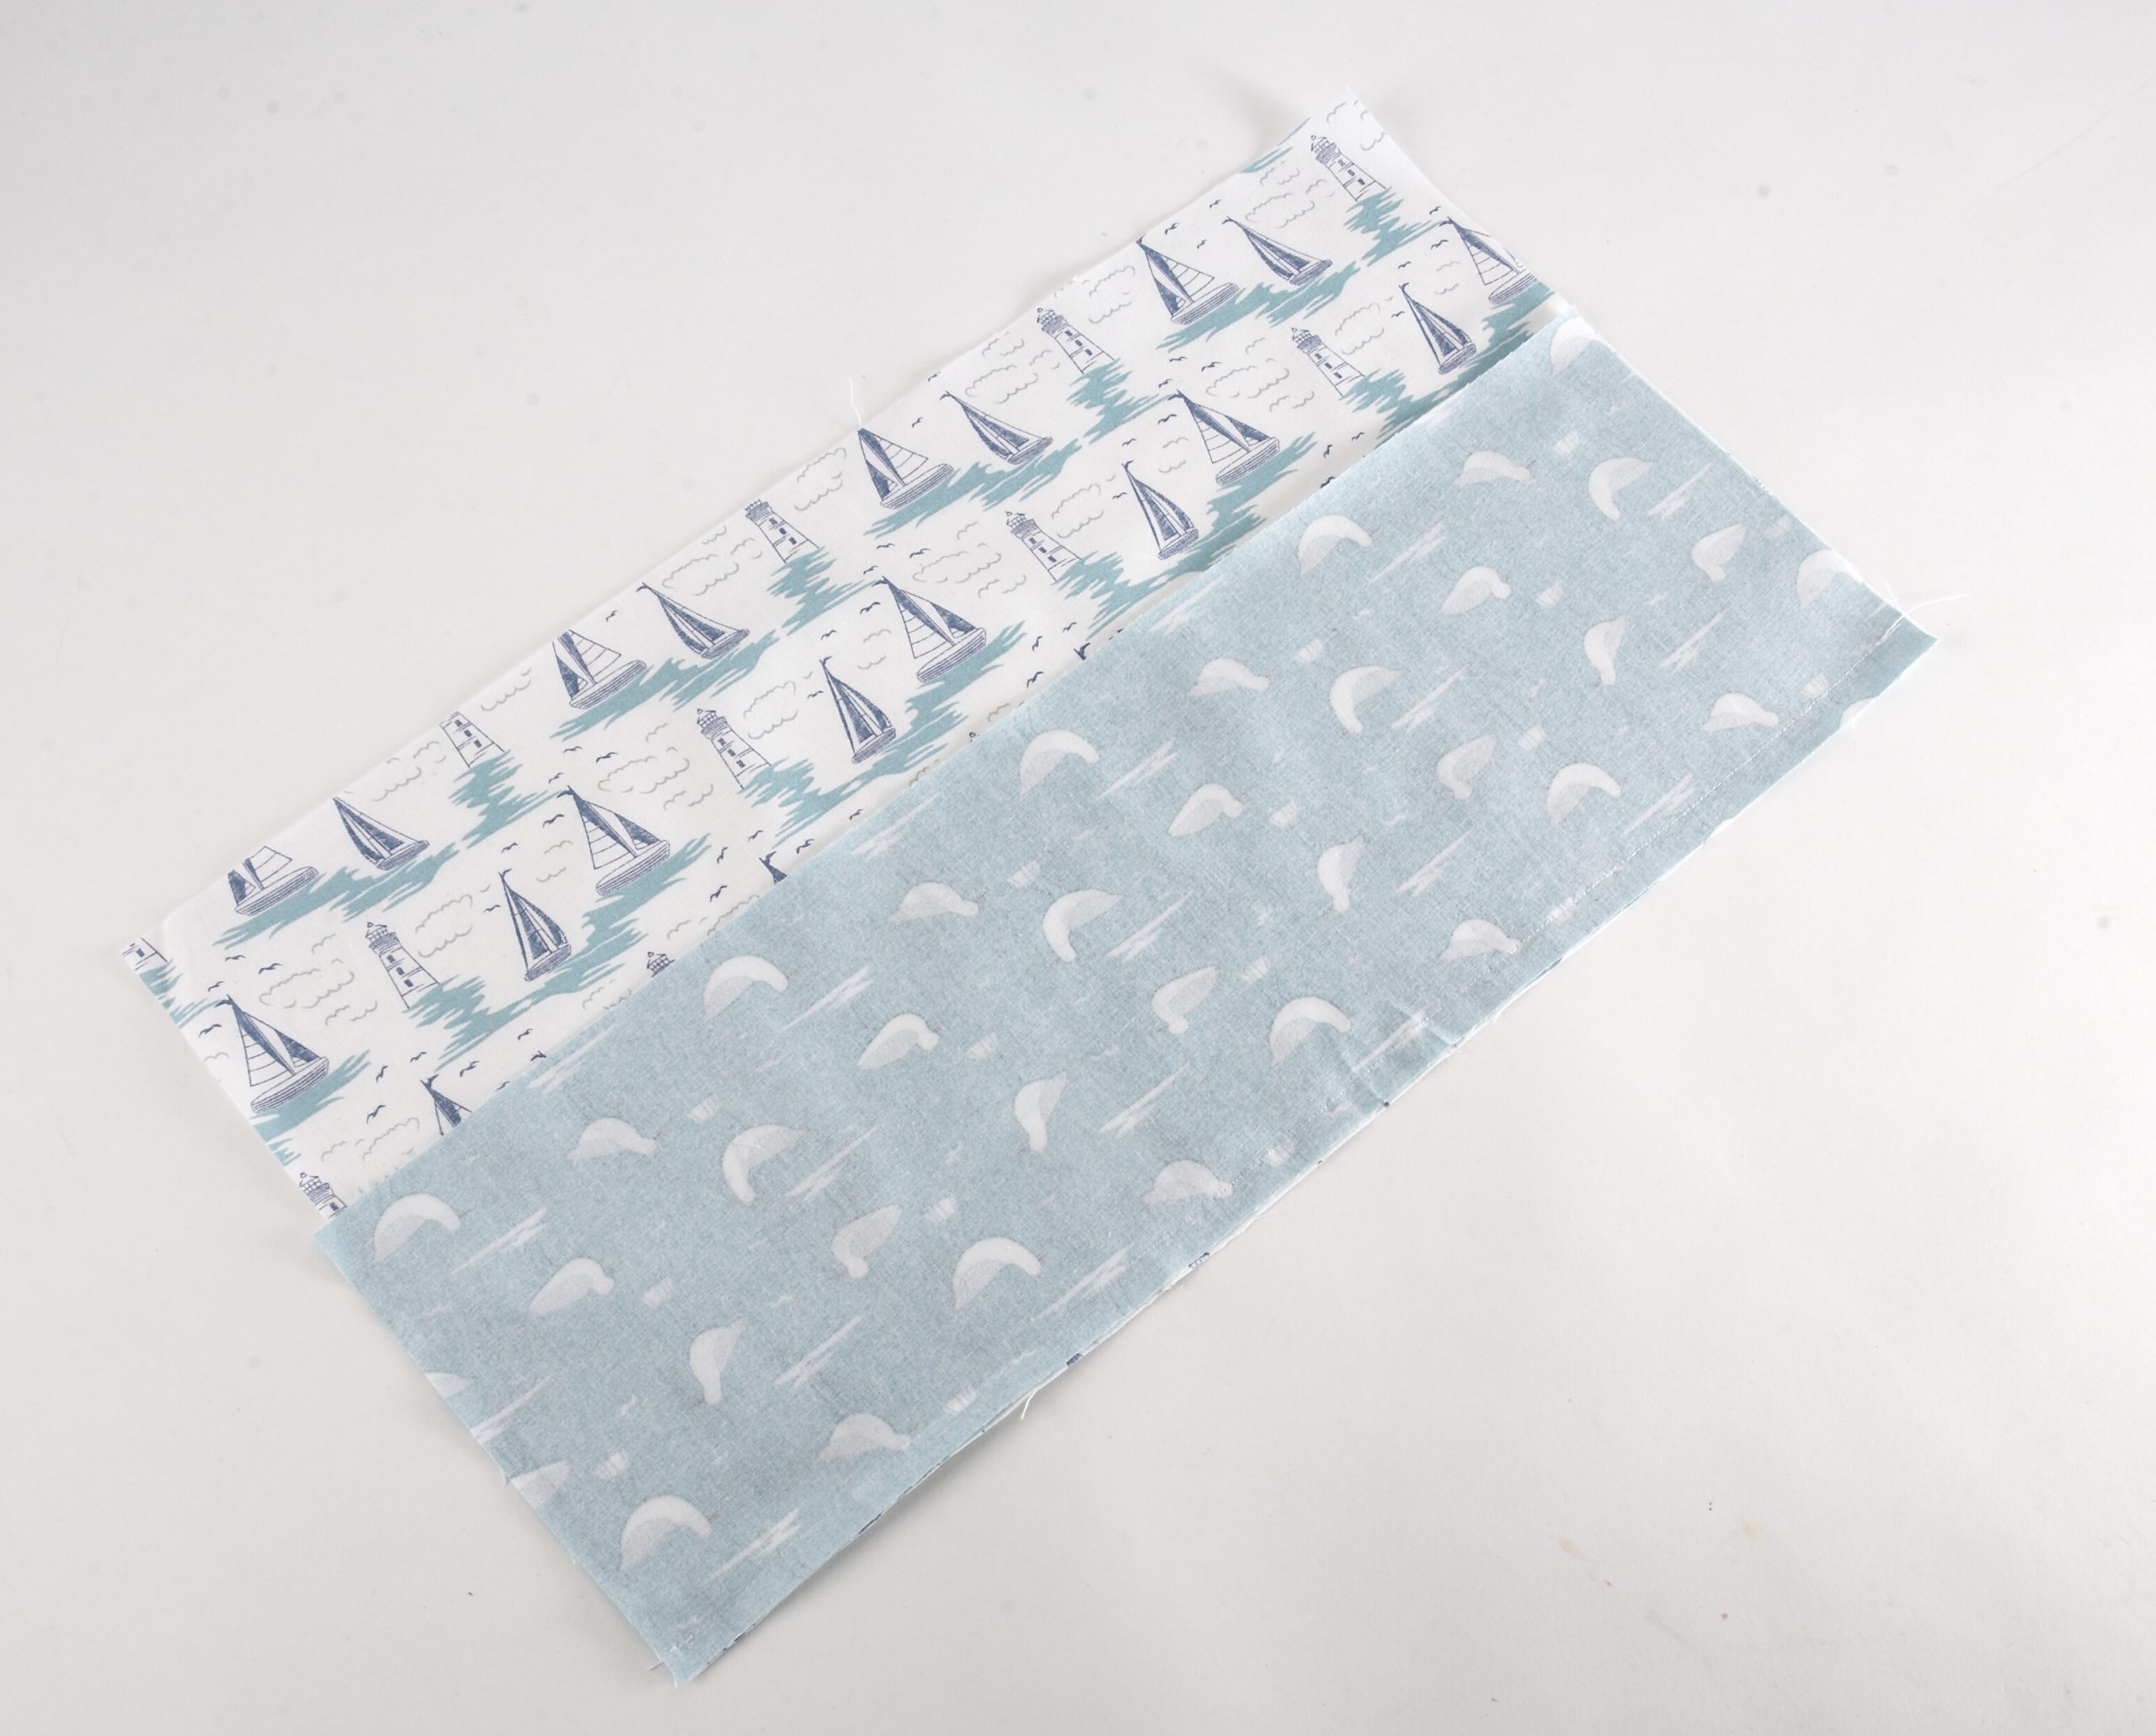
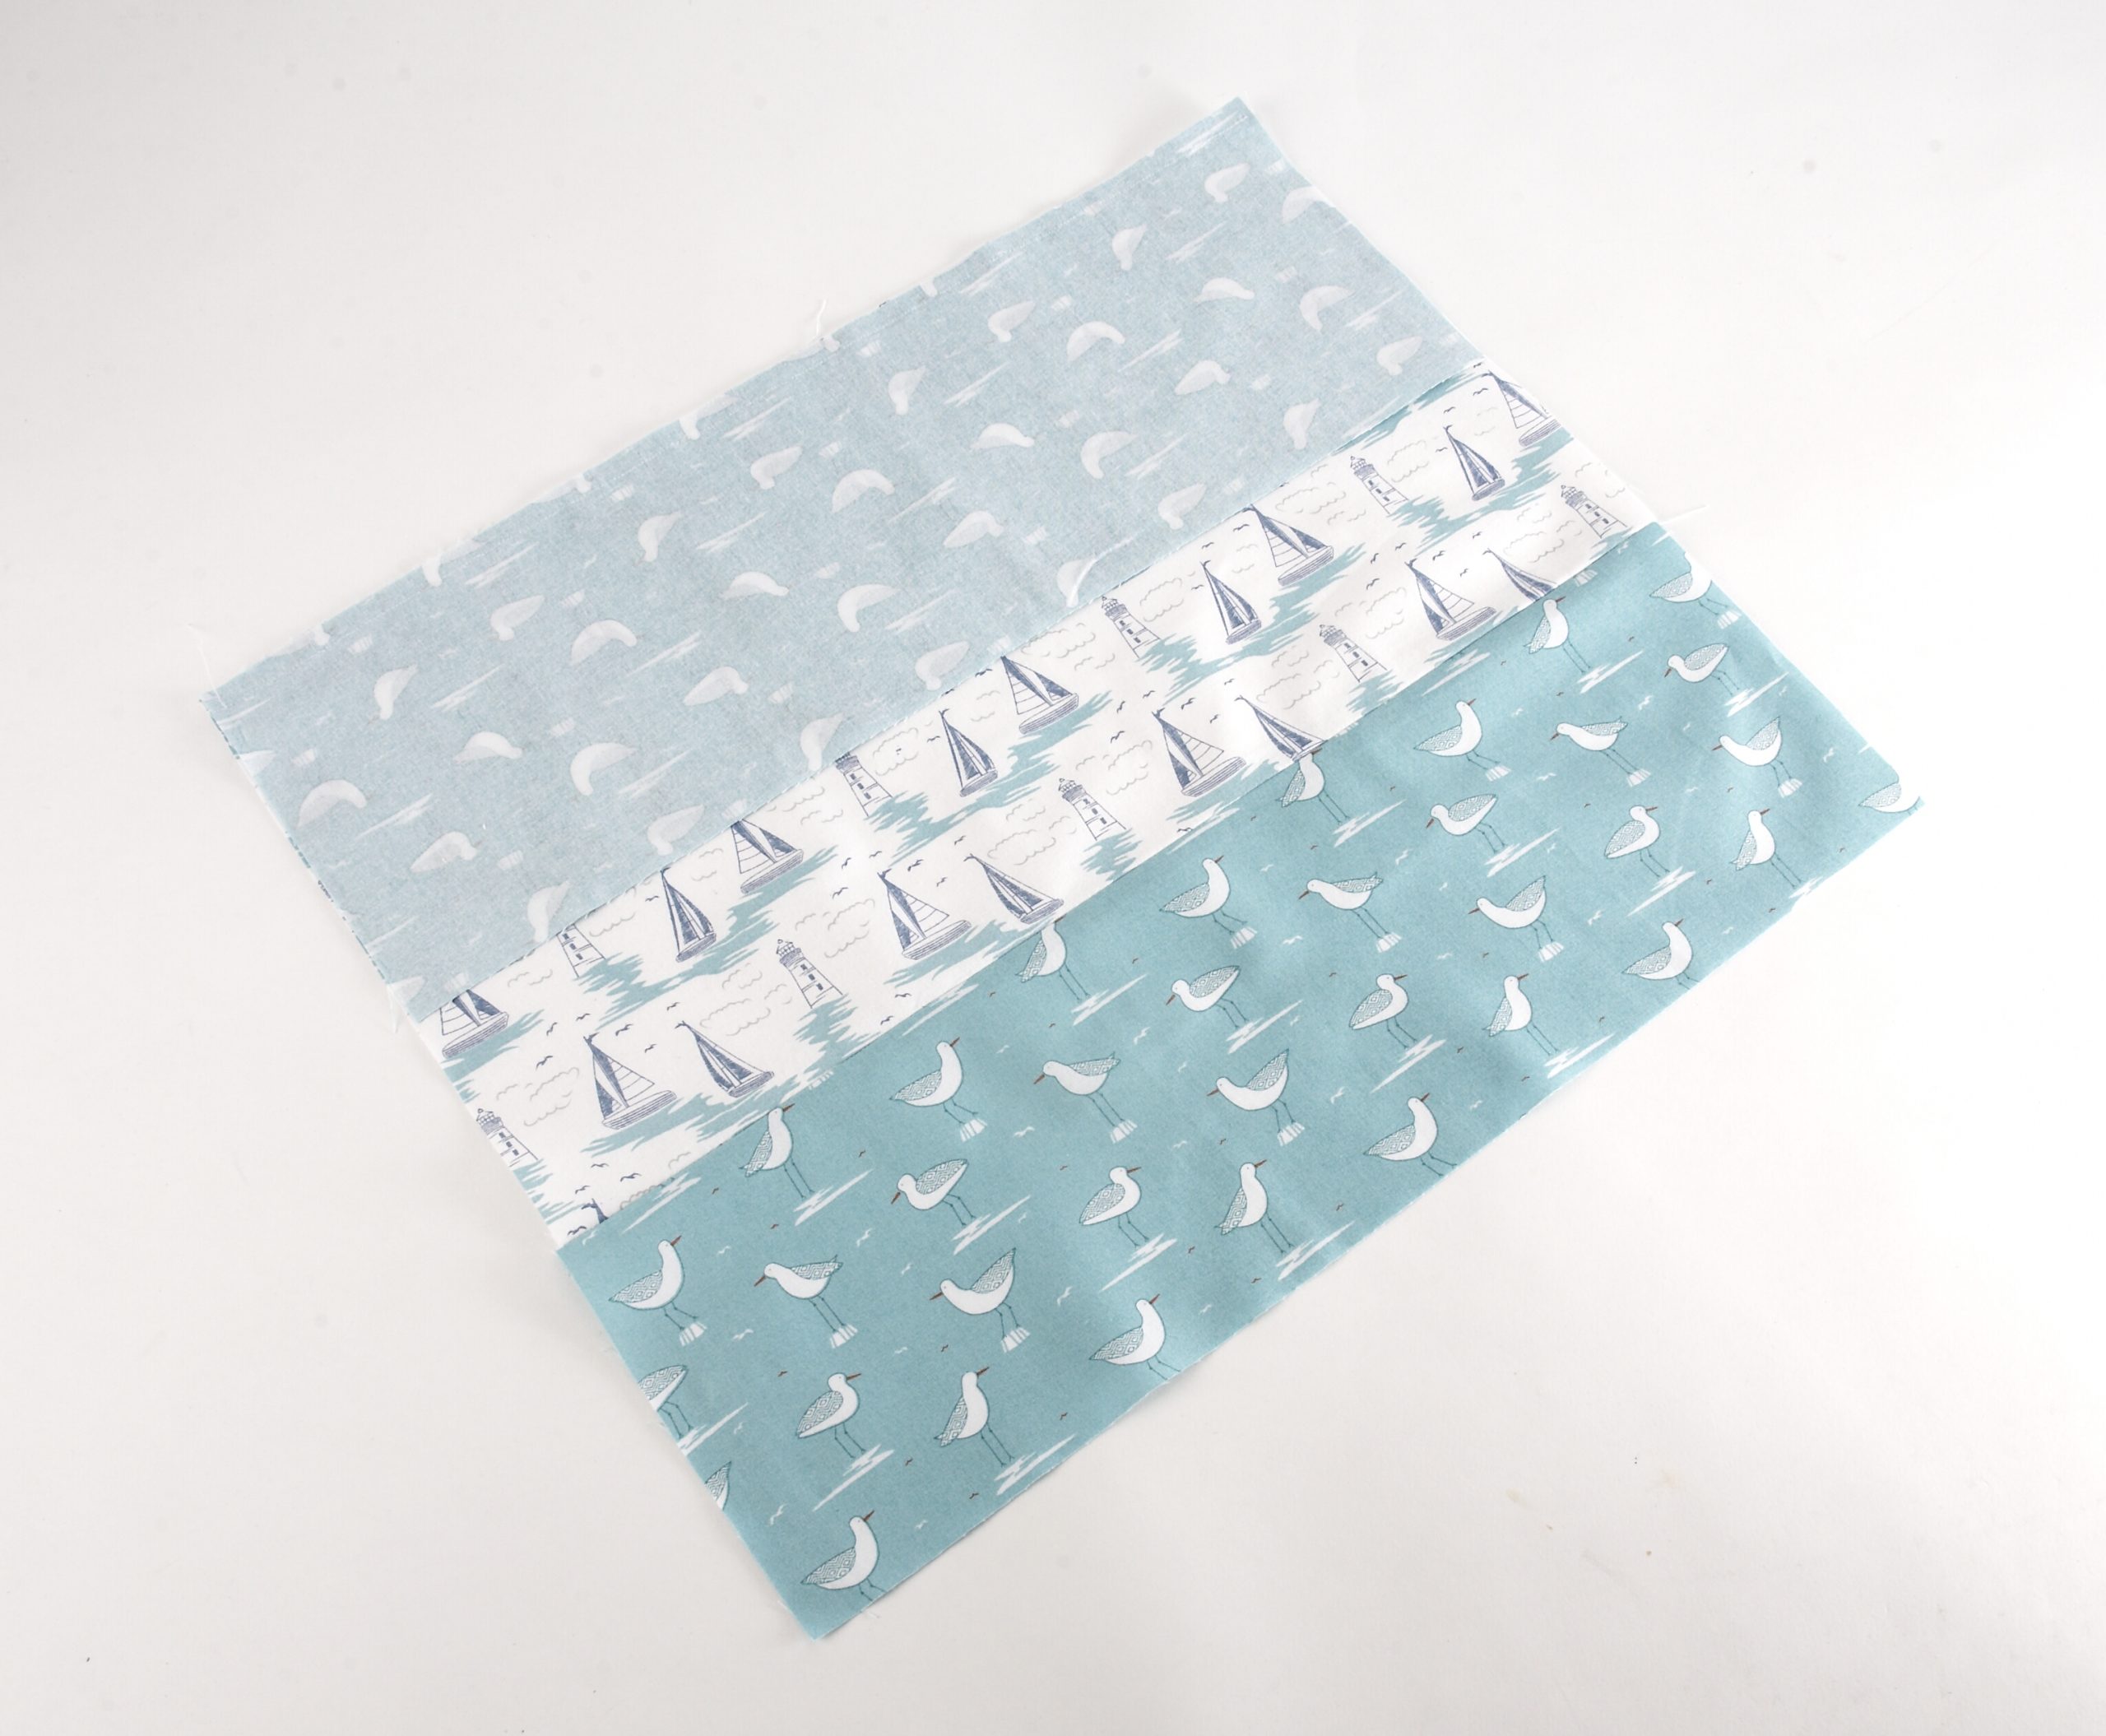
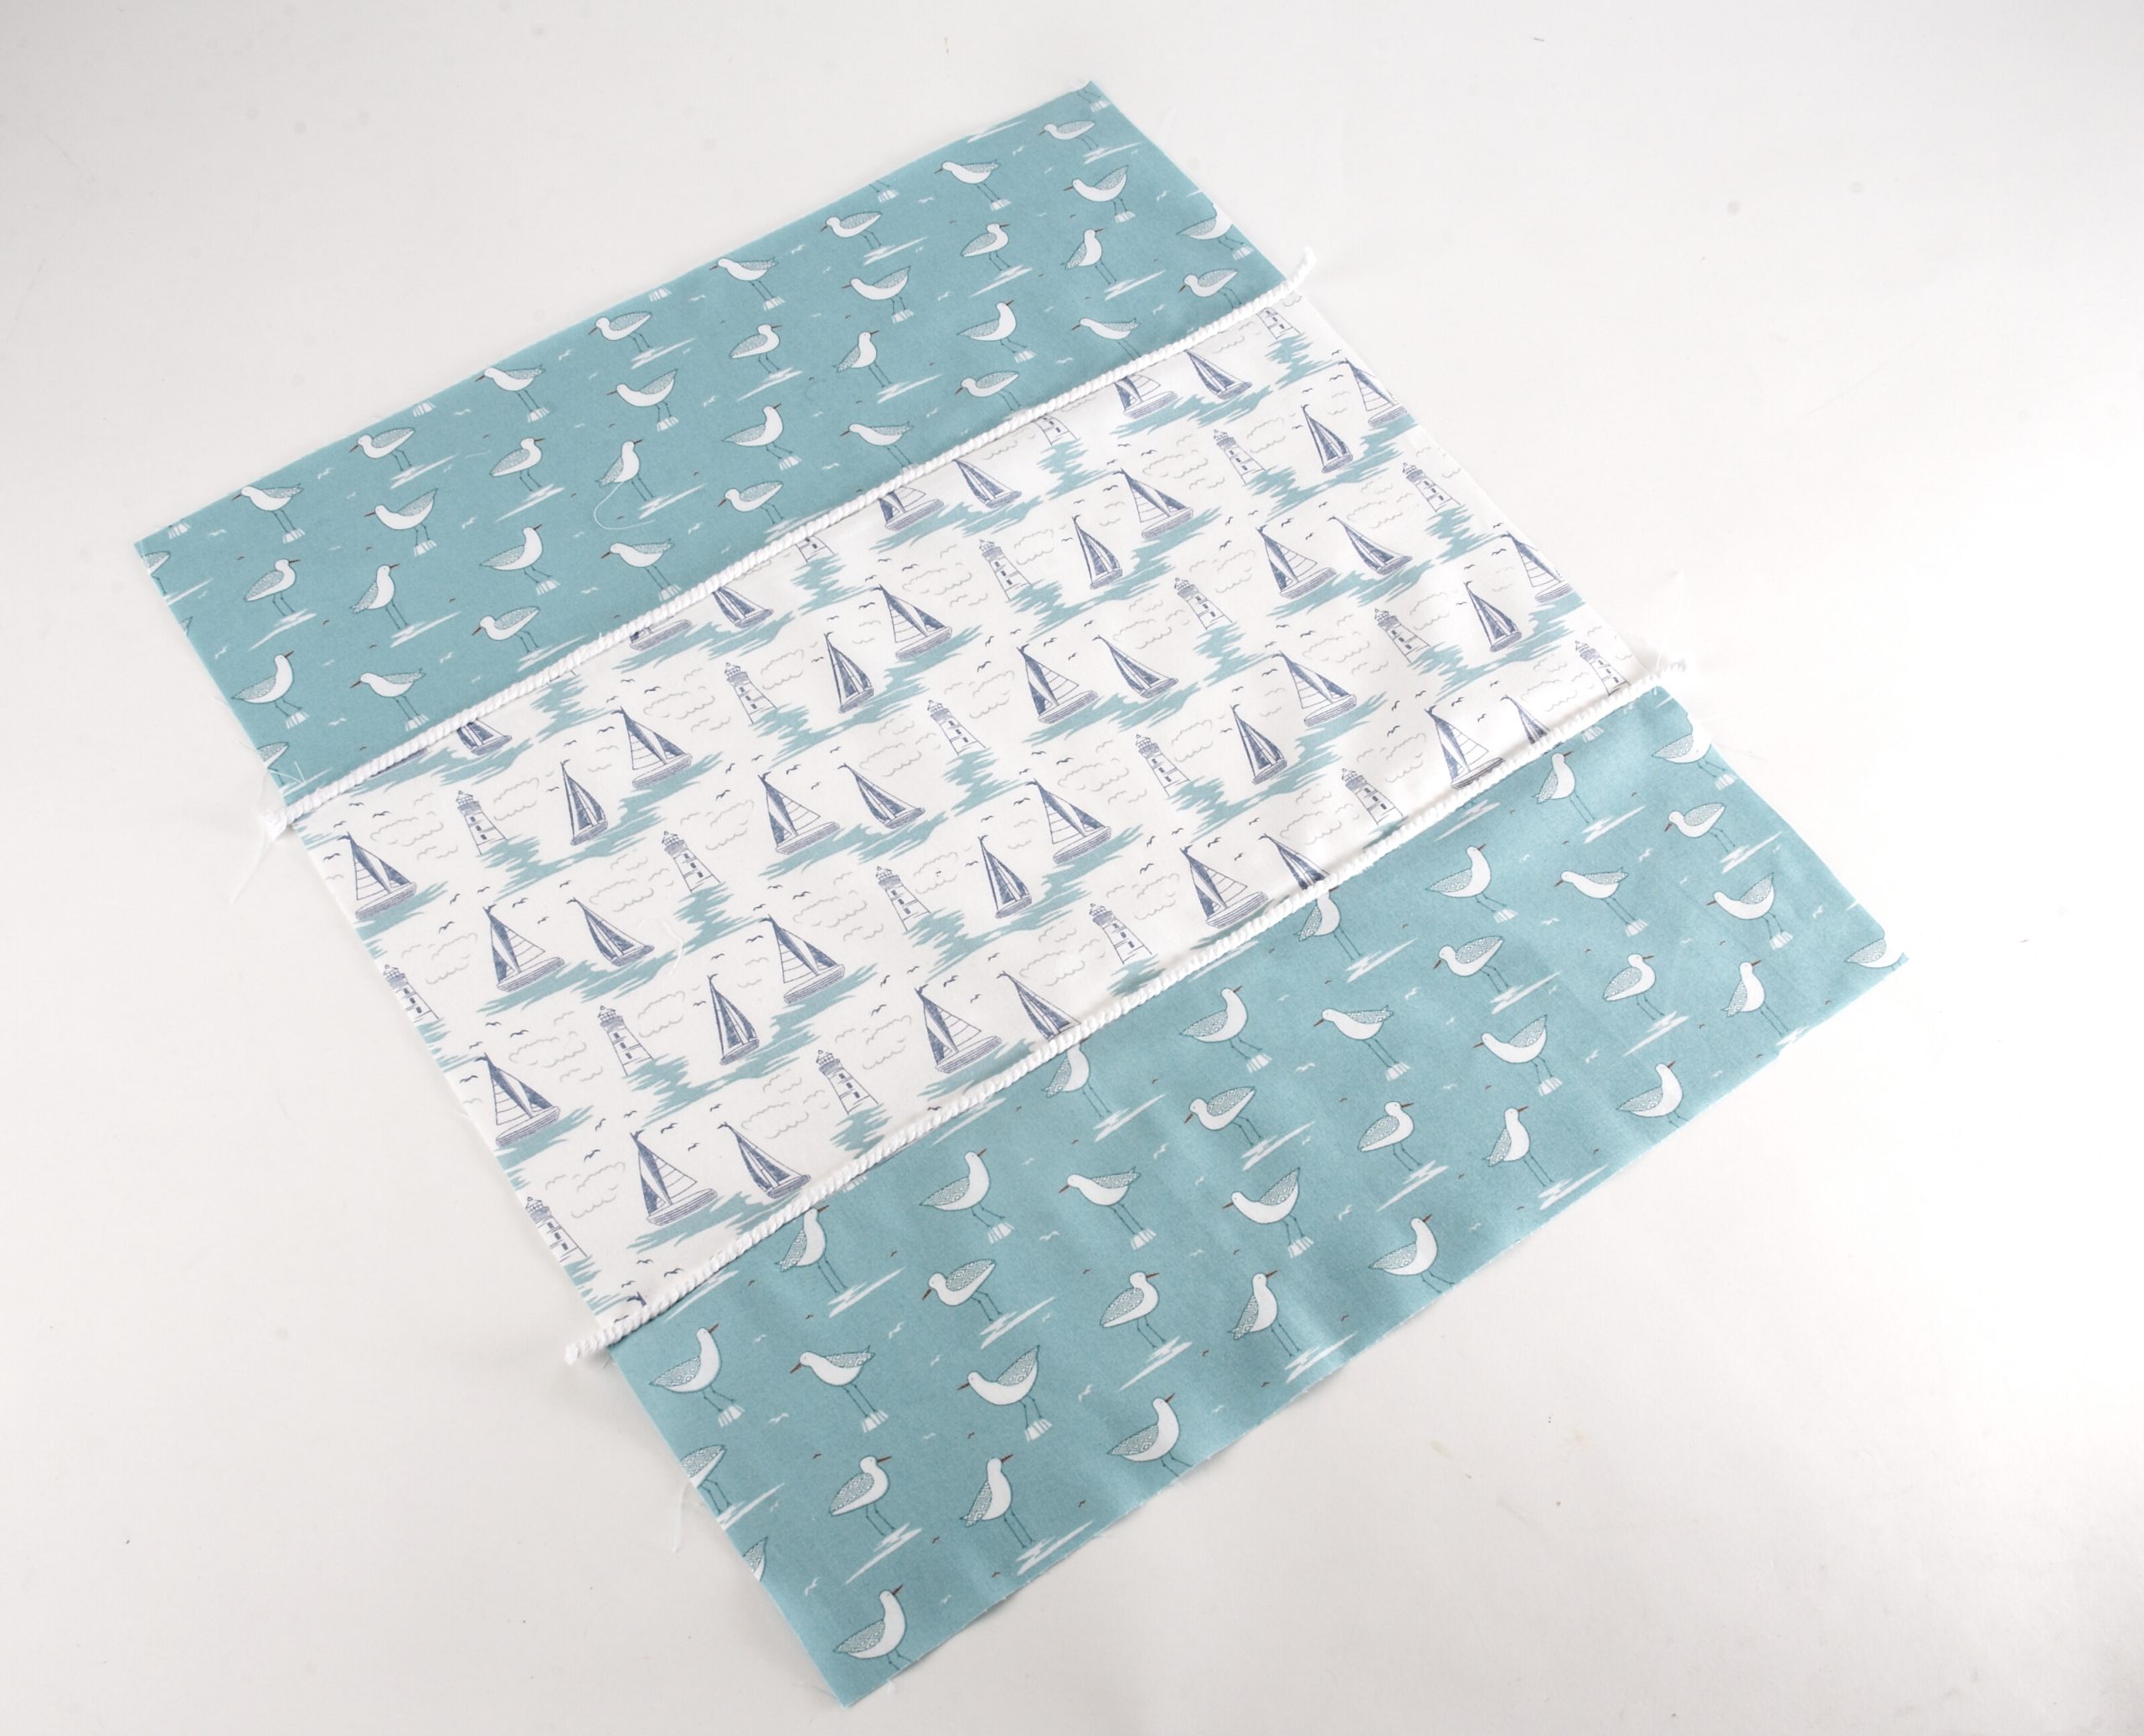
1 piece of fabric measuring 18 x 10”
2 pieces of fabric measuring 18 x 6”
2 pieces of ¼” piping cord measuring 19”
Quarter inch Elastic
Tools needed:
Seam ripper
Safety pin or threading tool
How to make:
- Sew one of the smaller strips of fabric right sides together to the bottom of the bigger piece. Open and press.
2. Sew the second smaller strip to the top of the bigger right sides together. Open and press.
3. Using a long and wide zigzag stitch, sew the 2 pieces of rope on the right sides of the fabric panel over the 2 seams.
4. Fold the fabric panel in half with right sides width ways and sew. Trim back any extra cord.
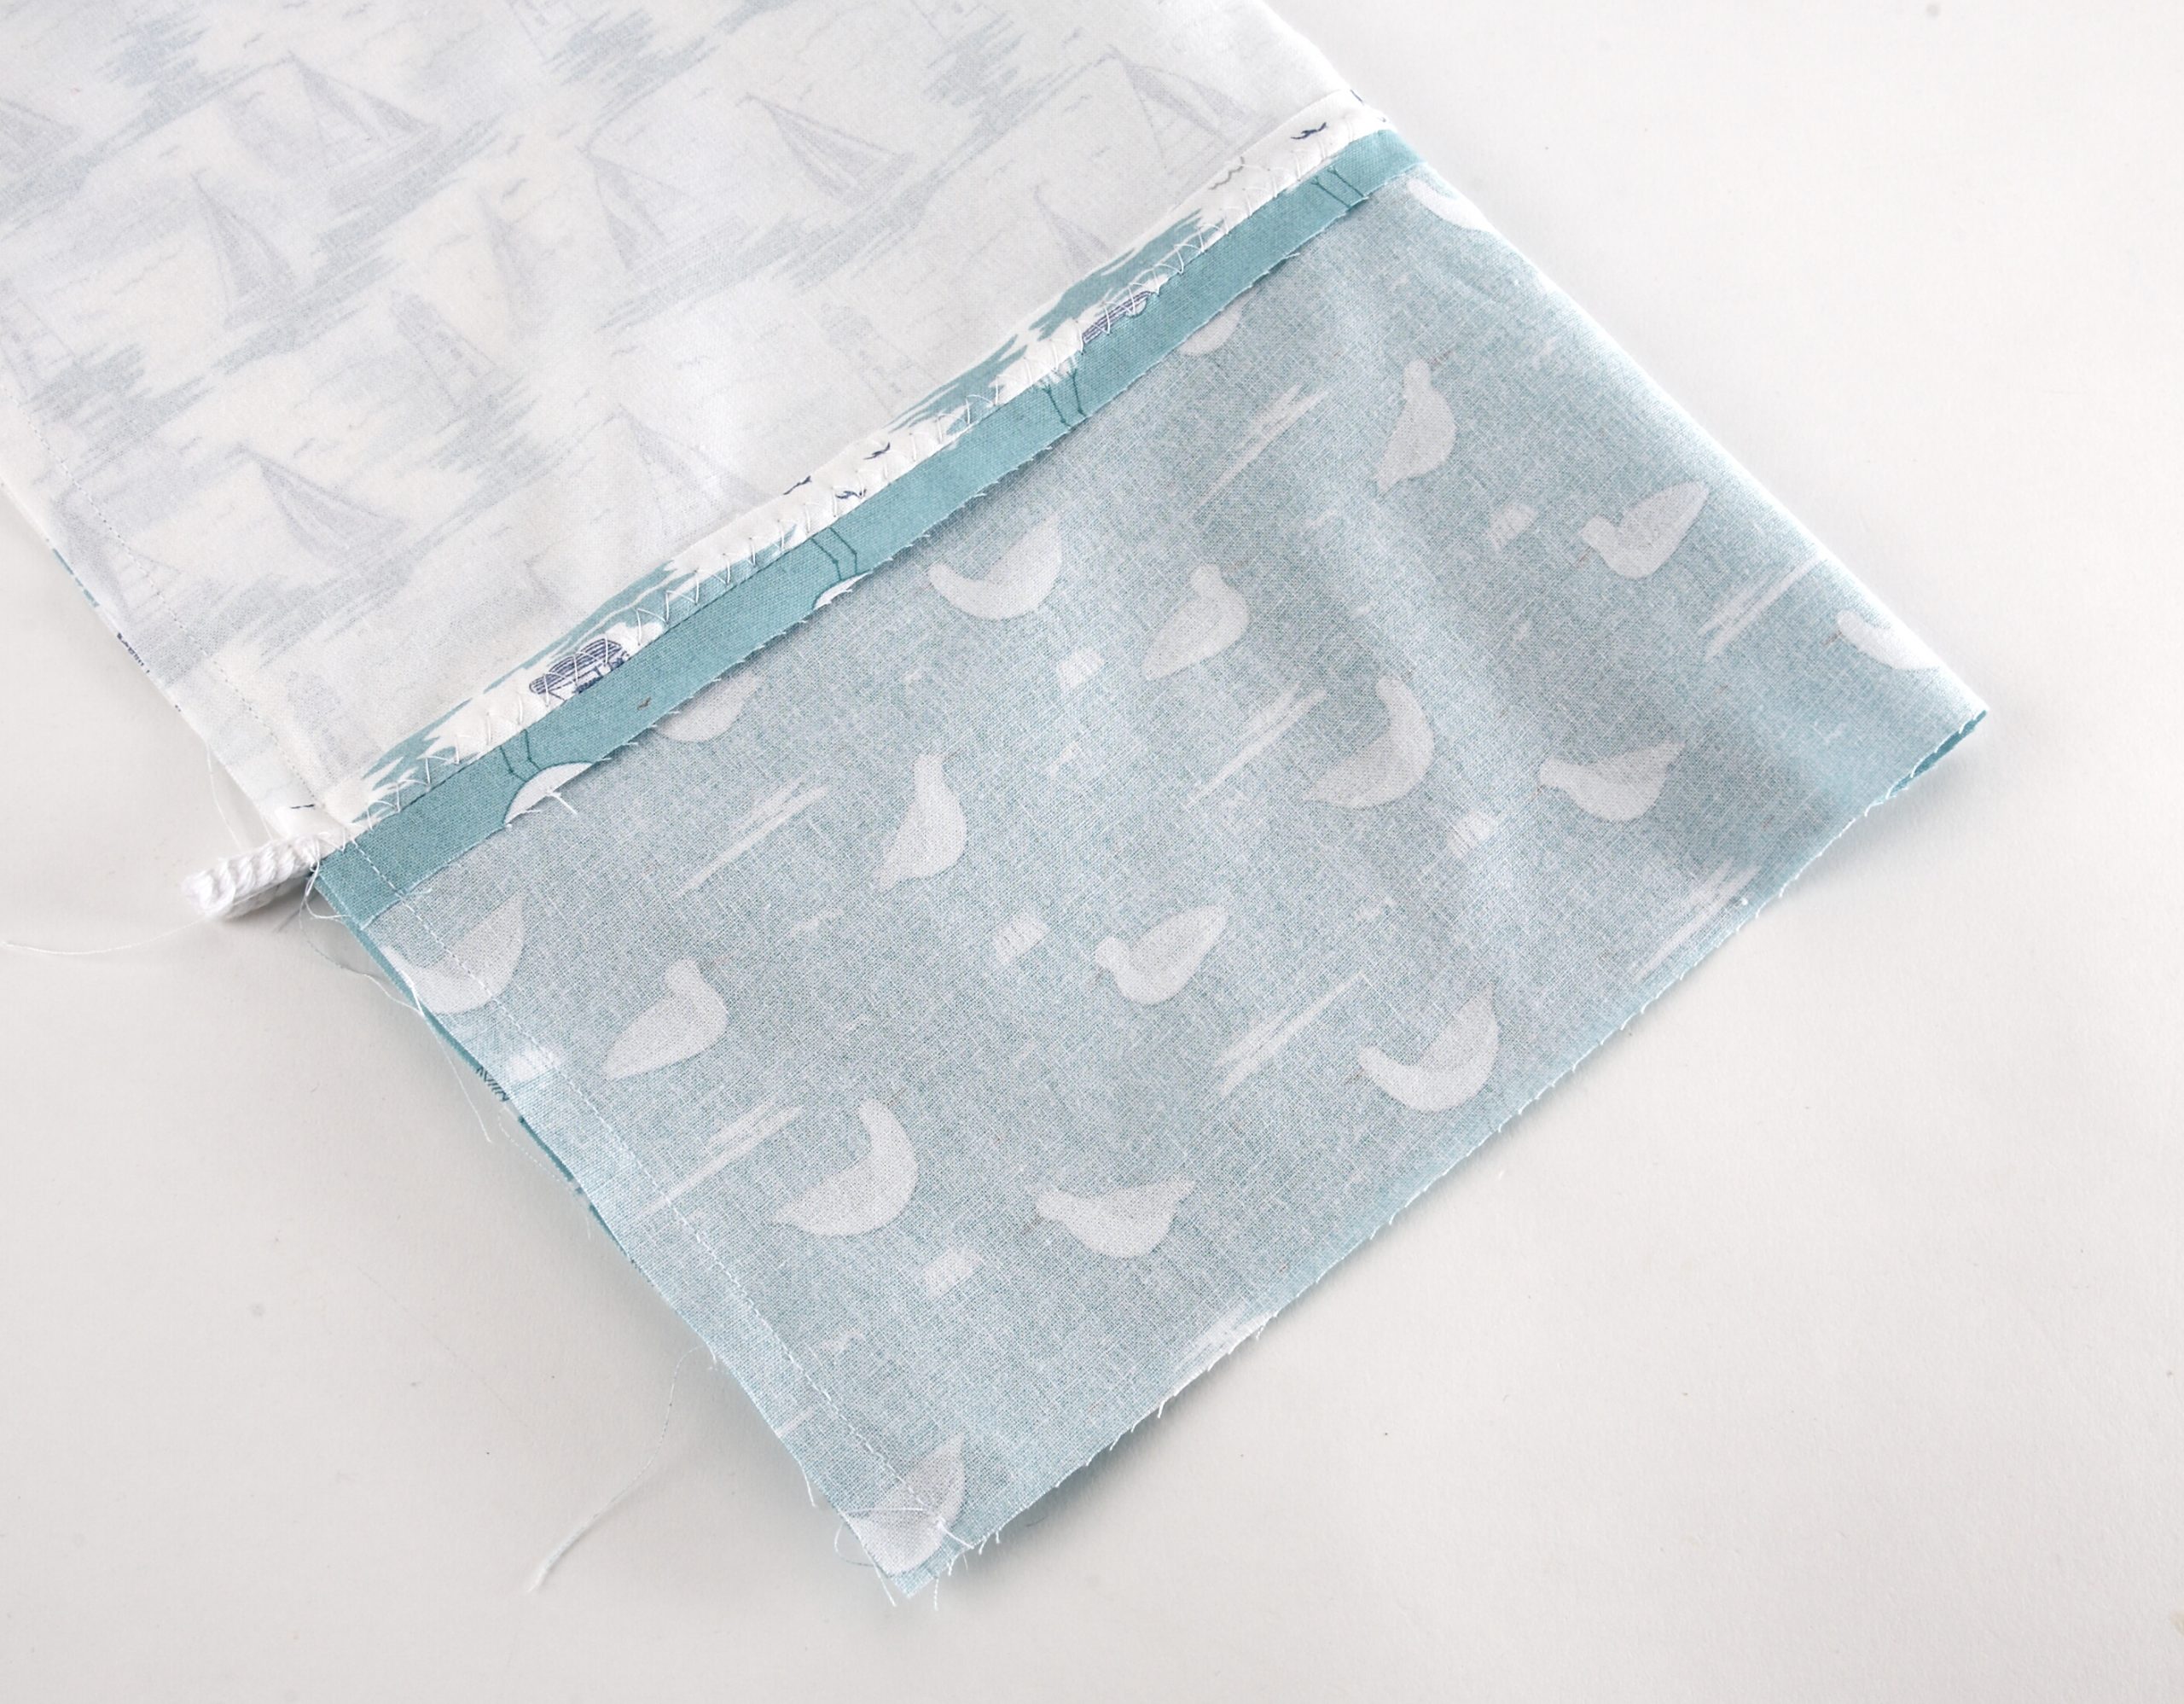
5. Fold the bottom over by 1/4” and press, then fold over by ½”. Press and sew.
6. Unpick a few of the stitches in the hem. Push a safety pin through one end of the elastic and use it to thread the elastic through the bottom of the tube.
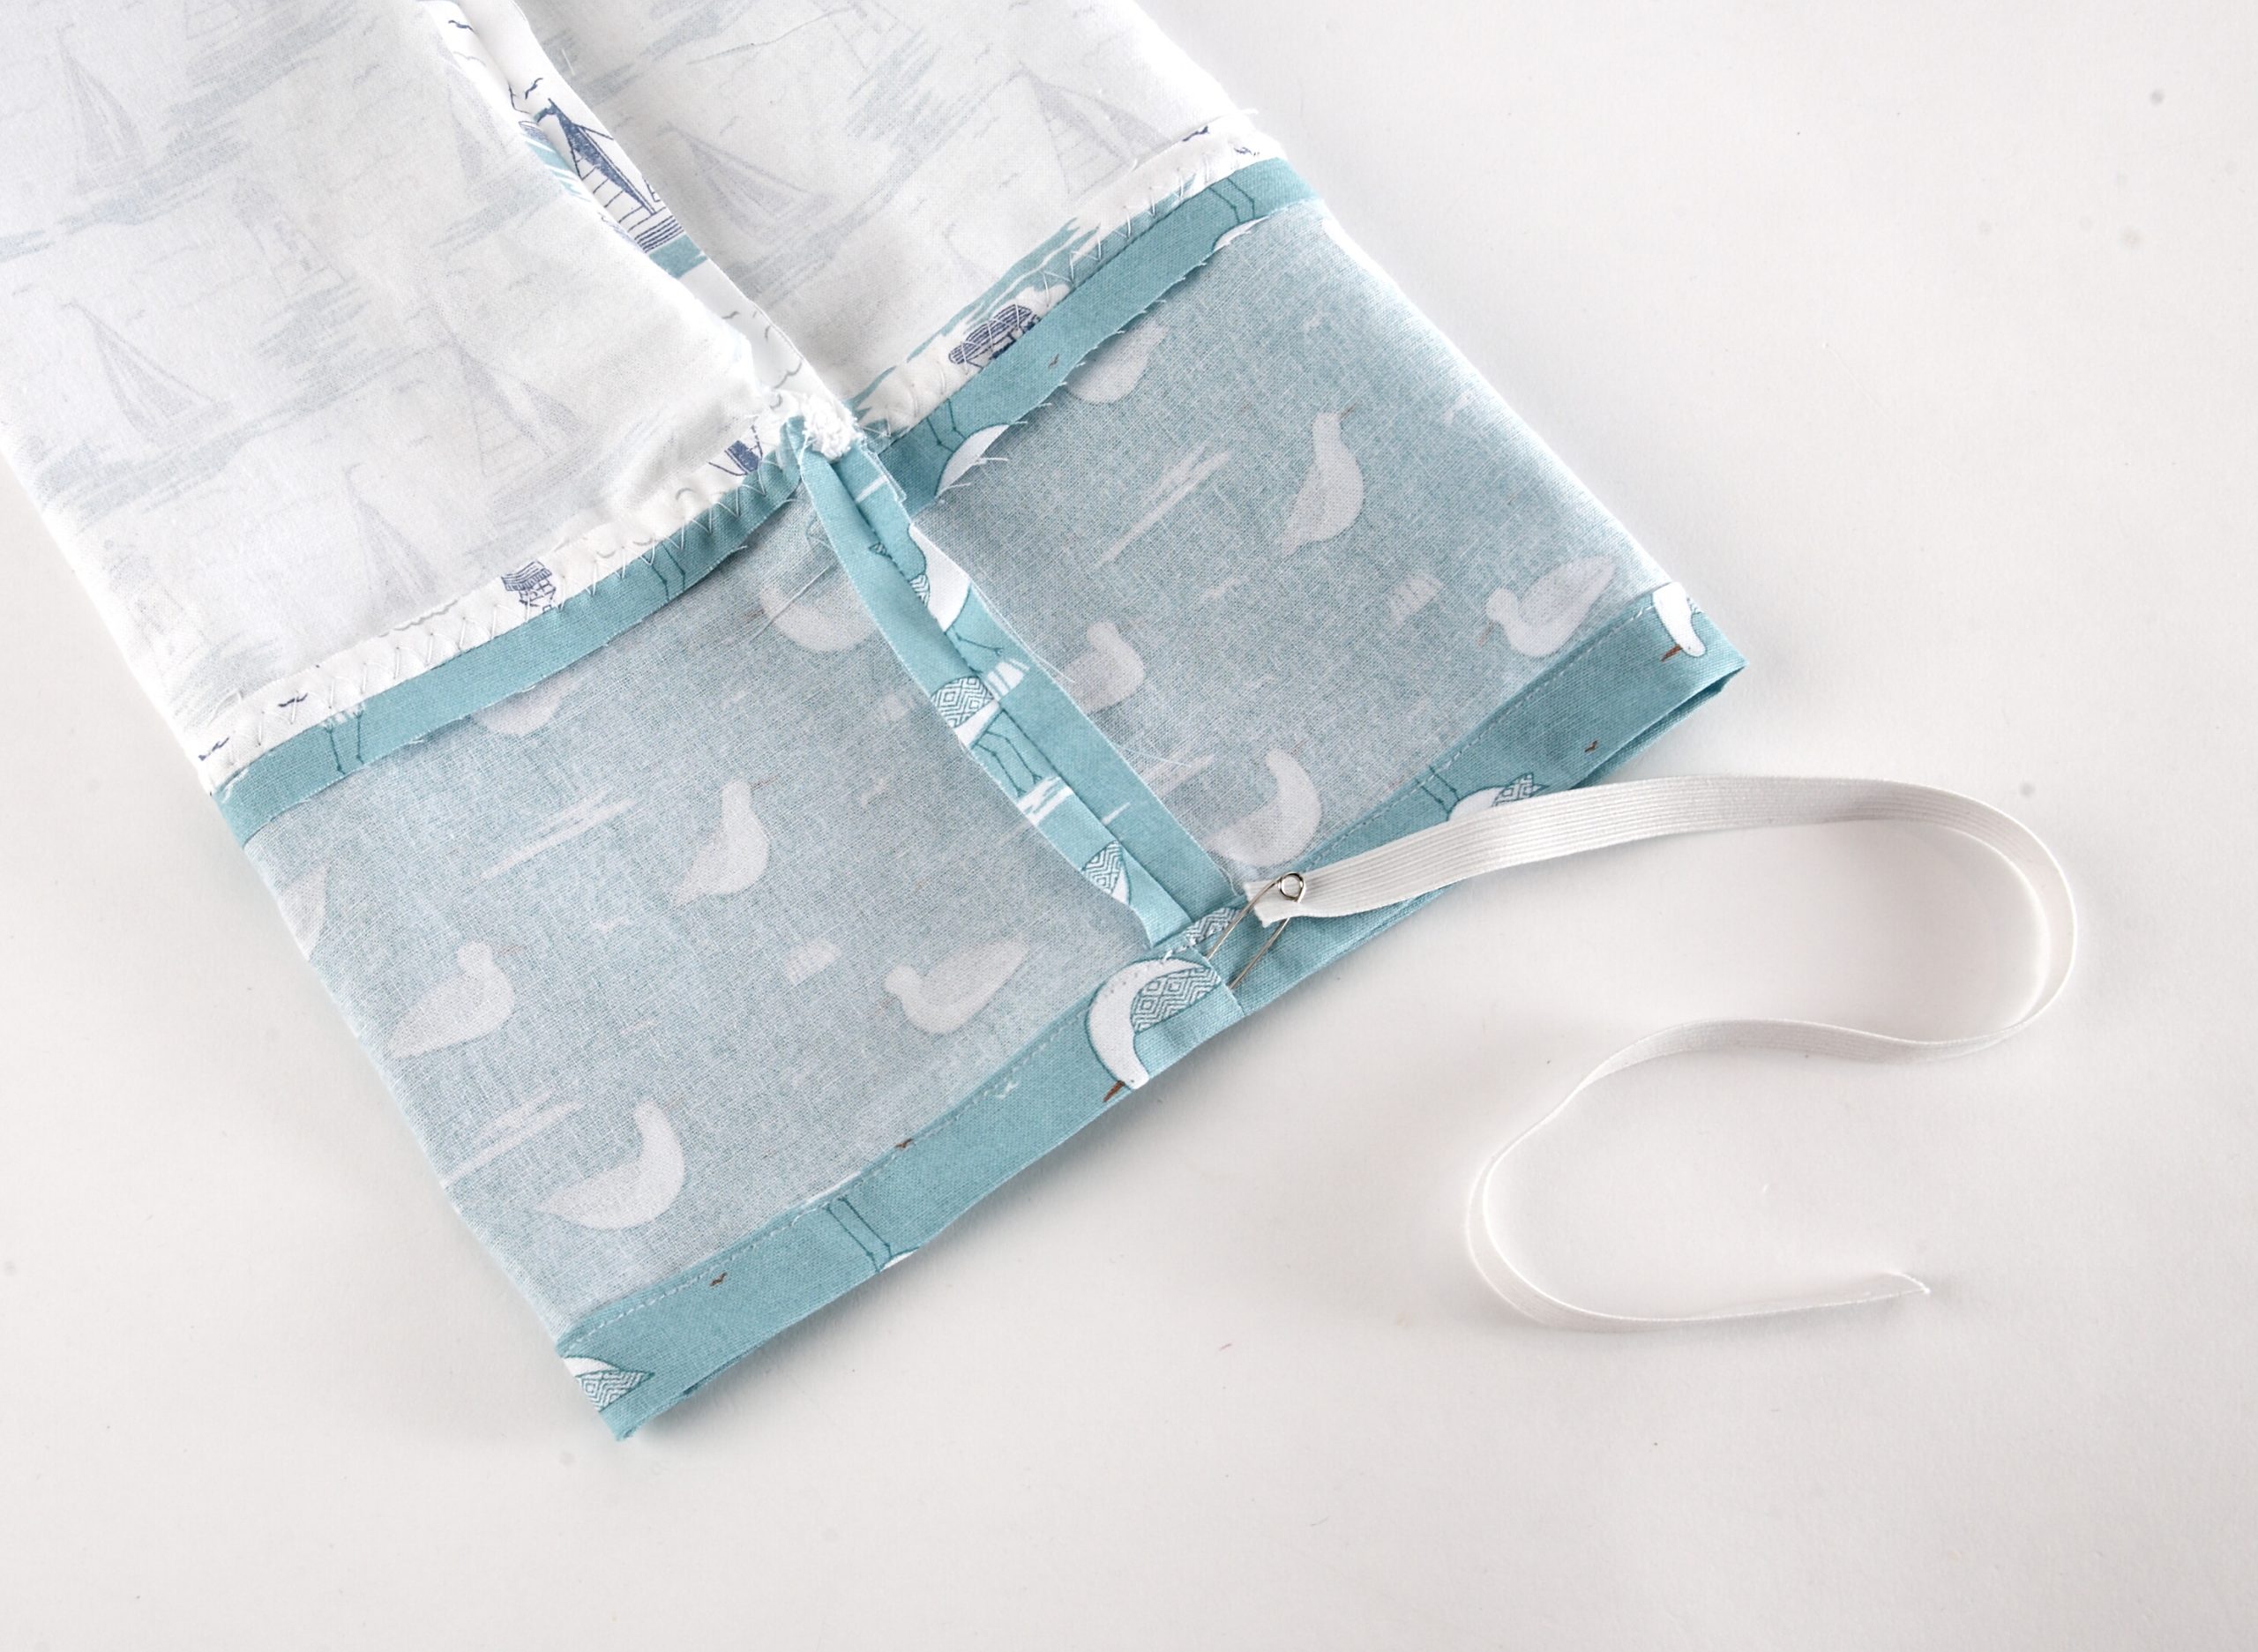
7. Pull the elastic tight and sew the two ends together and tuck them into the seam, sewing up the gap closed with a ladder stitch.
8. Repeat but using the cord at the top of the bag.
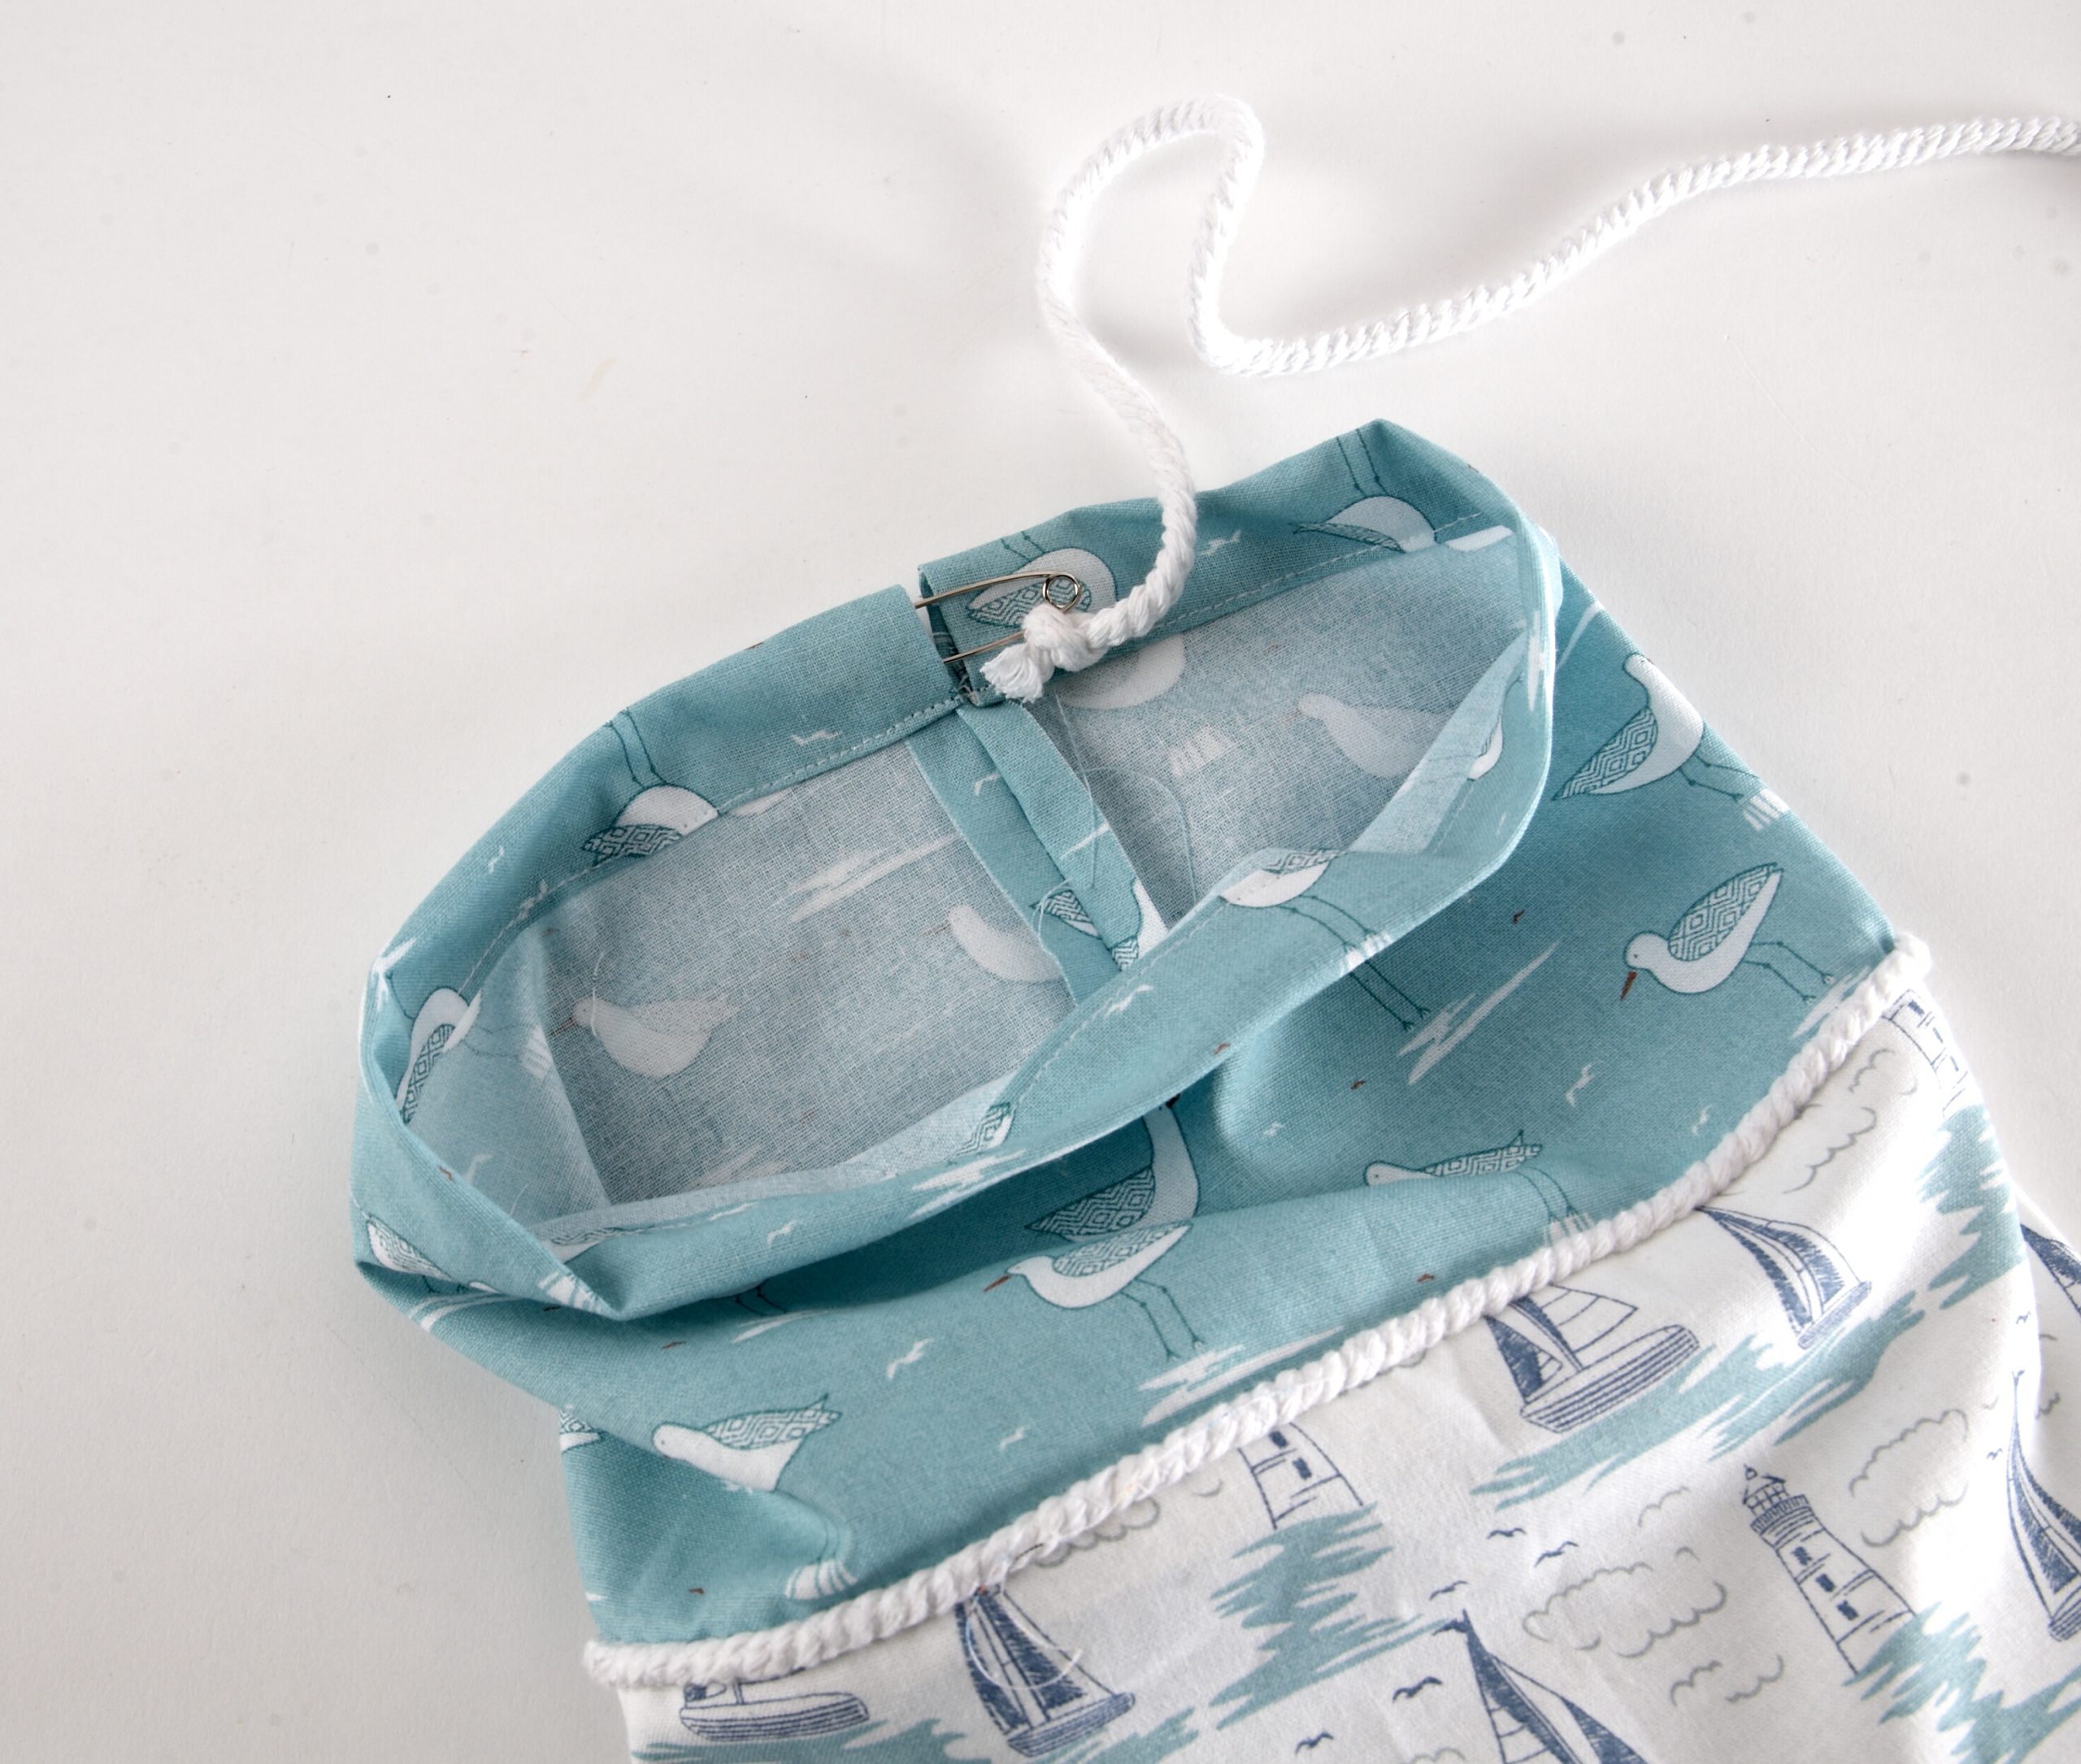
9. Knot the two ends together.
Pop your bags in the top and pull out through the bottom!